> For the complete documentation index, see [llms.txt](https://run-ai-docs.nvidia.com/llms.txt). Markdown versions of documentation pages are available by appending `.md` to page URLs; this page is available as [Markdown](https://run-ai-docs.nvidia.com/self-hosted/2.23/getting-started/installation/bcm-install/deployment.md).
# Connected Deployment
This guide walks through the `cm-kubernetes-setup` wizard to deploy NVIDIA Run:ai on an internet-connected BCM cluster. The wizard provisions Kubernetes, configures the GPU Operator, Network Operator, MetalLB, and Prometheus, and deploys the NVIDIA Run:ai control plane and cluster in a single workflow.
Before starting, complete the [Preparations](/self-hosted/2.23/getting-started/installation/bcm-install/preparations.md) checklist to ensure all required IP addresses, DNS records, TLS certificates, and credentials are in place.
{% hint style="info" %}
**Air-gapped deployment**
If your cluster has no internet access, see the [Air-gapped deployment](/self-hosted/2.23/getting-started/installation/bcm-install/airgapped-deployment.md) guide instead.
{% endhint %}
## Preparations
Before installing NVIDIA Run:ai, make sure you have reviewed the [Preparations](/self-hosted/2.23/getting-started/installation/bcm-install/preparations.md) section and completed all tasks indicated in the [Pre-installation checklist](/self-hosted/2.23/getting-started/installation/bcm-install/preparations.md#pre-installation-checklist).
## BCM Version
The instructions in this document are specific to BCM 11, with a minimum required version of **11.32.1**.
## Deploy Using the Wizard
1. Access the active BCM head node via ssh:
```sh
ssh root@
```
2. Verify the BCM version:
```sh
cm-package-release-info -f cm-setup,cmdaemon
Name Version Release(s)
-------- --------- ------------
cm-setup 123773 11.32.1
cmdaemon 164704 11.32.1
```
3. Create the following files in the `/cm/shared/runai/` directory populating each respectively from the linked content. Similarly, populate [validation test files](/self-hosted/2.23/getting-started/installation/bcm-install/validation-tests.md) respective to the DGX platform:
* [DGX B200 Configuration](/self-hosted/2.23/getting-started/installation/bcm-install/dgx-b200-configuration.md)
* [DGX GB200 Configuration](/self-hosted/2.23/getting-started/installation/bcm-install/dgx-gb200-configuration.md)
* [DGX B300 Configuration](/self-hosted/2.23/getting-started/installation/bcm-install/dgx-b300-configuration.md)
* [DGX GB300 Configuration](/self-hosted/2.23/getting-started/installation/bcm-install/dgx-gb300-configuration.md)
4. Verify that all files from the [Preparations](/self-hosted/2.23/getting-started/installation/bcm-install/preparations.md) section and the step above have been created and are present:
```sh
root@bcm11-headnode:~# ls -1 /cm/shared/runai/*
# Example for GB300
credential.jwt
netop-values-gb300.yaml
nic-cluster-policy-gb300.yaml
combined-ippools-gb300.yaml
combined-sriovibnet-gb300.yaml
dra-computedomain-test.yaml
ib-bandwidth-test.yaml
sriov-node-pool-config.yaml
full-chain.pem
private.key
ca.crt # only required when using a local certificate authority
```
5. Run the following command to initiate deployment via an interactive command-line assistant:
```sh
cm-kubernetes-setup
```
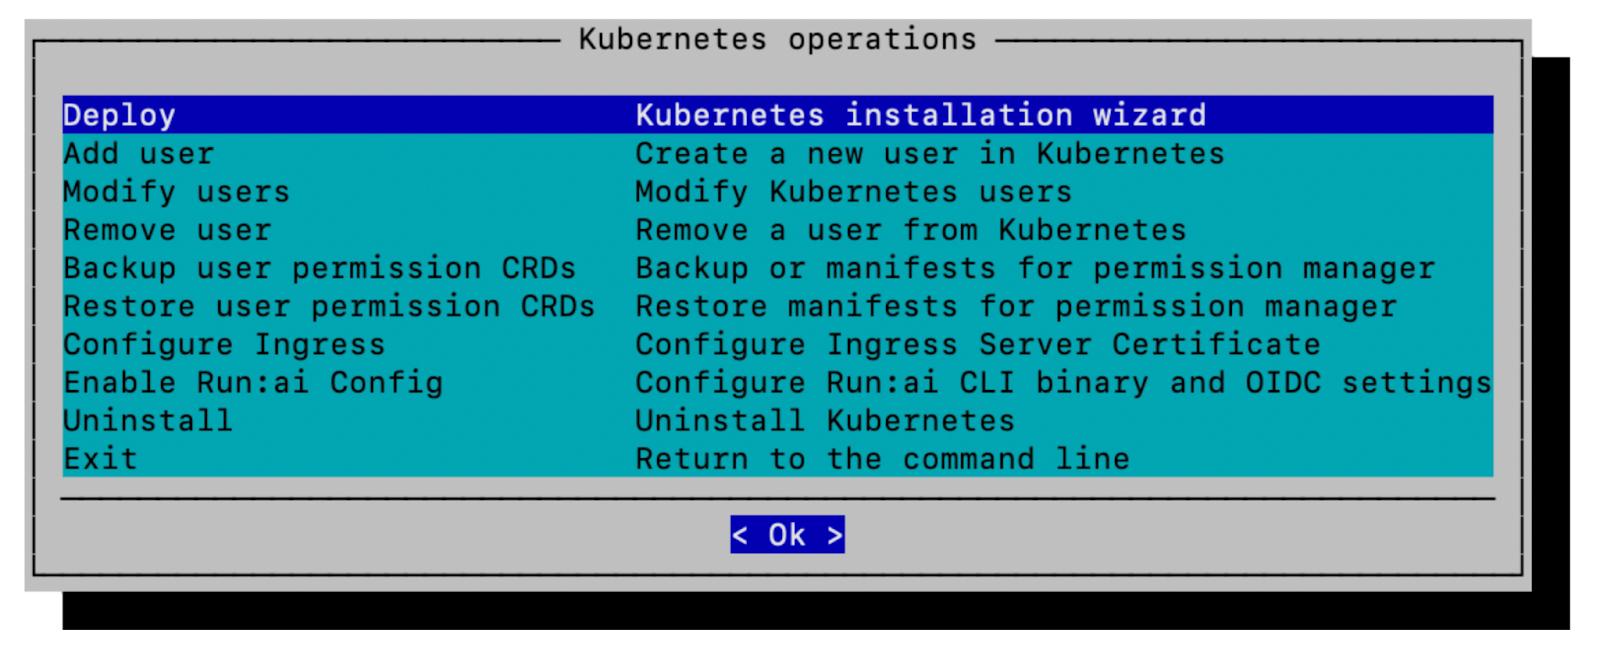
6. Select **Deploy Kubernetes installation wizard** and click **Ok** to proceed. If `cm-kubernetes-setup` is being run from GB200 or GB300, refer to the second screenshot:
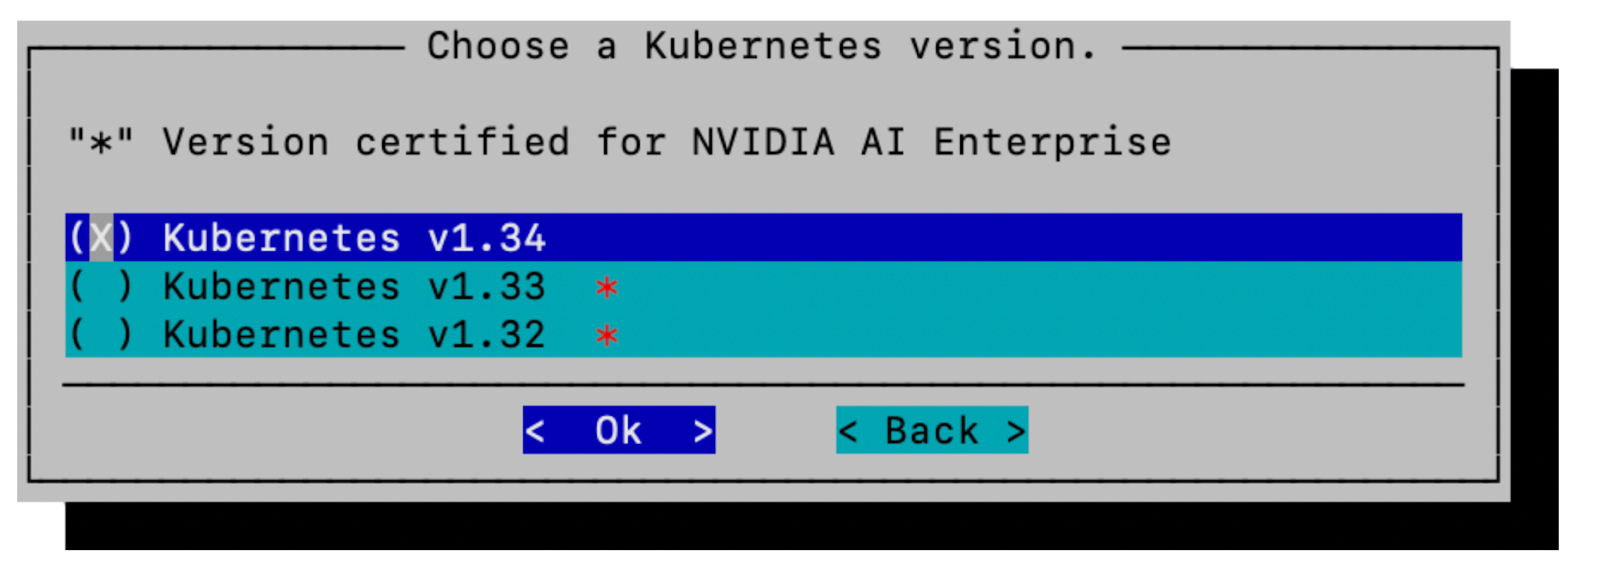
7. Select the relevant **Kubernetes** version. This guide, employing Base Command Manager 11.32.1, is based on and requires Kubernetes 1.34. Click **Ok** to proceed:
8. The next step inquires if there's a Docker Hub registry mirror available. It's recommended that a local registry mirror be employed when available. For the purpose of this guide, leave the default value (blank) and click **Ok** to proceed:
9. Insert values for the new Kubernetes cluster that NVIDIA Run:ai will be installed into. Click **Ok** to proceed:
* The Kubernetes cluster name should be a short, unique name that can be used to distinguish between multiple clusters (i.e. `k8s-user`).
* The `k8s-user.local` value for Kubernetes domain name is the default value for internal (within the Kubernetes cluster) name resolution and service discovery. It should be unique to distinguish it from the NMC cluster on DGX GB200 & GB300 SuperPODs. Common practice is to avoid using the same domain for the internal Kubernetes domain name and externally referenceable FQDN to avoid potential name resolution inconsistencies.
* The Kubernetes external FQDN field refers to the domain name that the Kubernetes API Server will be proxied at and will be automatically populated by BCM. If a valid name record (FQDN) for the BCM head node has been established prior that should be entered here. Please see the reference architecture section of the [BCM Containerization Manual](https://support.brightcomputing.com/manuals/11/containerization-manual.pdf) for details on how this is implemented via an NGINX proxy.
* The Service network base address, Service network netmask bits, Pod network base address, & Pod network netmask bits fields provide CIDR ranges for Kubernetes service and pod networks. These will be pre-populated (taking care to avoid overlapping ranges from networks known to BCM) from private, non-routable ranges.
10. The next step asks about exposing the Kubernetes API server to the external network. Select **no** and click **Ok** to proceed:
11. The preferred internal network is used for Kubernetes intercommunication between ctrl plane and worker nodes. Select **internalnet** for the preferred internal network and click **Ok** to proceed:
12. Select 3 or more Kubernetes master nodes. These should be the same nodes assigned to the control plane category. The screenshot below is for illustration only - the correct category should be `k8s-system-user`. See the [BCM node categories](/self-hosted/2.23/getting-started/installation/bcm-install/preparations.md#bcm-node-categories) section for more information. Click **Ok** to proceed:
{% hint style="info" %}
**Note**
To ensure high availability and prevent a single point of failure, it is recommended to configure at least three Kubernetes master nodes in your cluster. The nodes selected at this stage will be employed to serve the needs of the control plane and should be located on CPU nodes. In contemporary Kubernetes versions, "master nodes" are referred to as control plane nodes.
{% endhint %}
13. Select the worker node categories to operate as the Kubernetes worker nodes. The screenshot below is for illustration only - the correct category should be `dgx-gb300-k8s`, `dgx-b300-k8s` or similar and `k8s-system-user`. See the [BCM node categories](/self-hosted/2.23/getting-started/installation/bcm-install/preparations.md#bcm-node-categories) section for more information. Click **Ok** to proceed:
{% hint style="info" %}
**Note**
Both the control plane nodes and the DGX nodes must be selected. Selecting the control plane nodes here allows select NVIDIA Run:ai services to run on the control plane nodes. If the cluster configuration has dedicated NVIDIA Run:ai system nodes as described in the optional [Node Category](#bcm-node-categories) section select that category here instead.
{% endhint %}
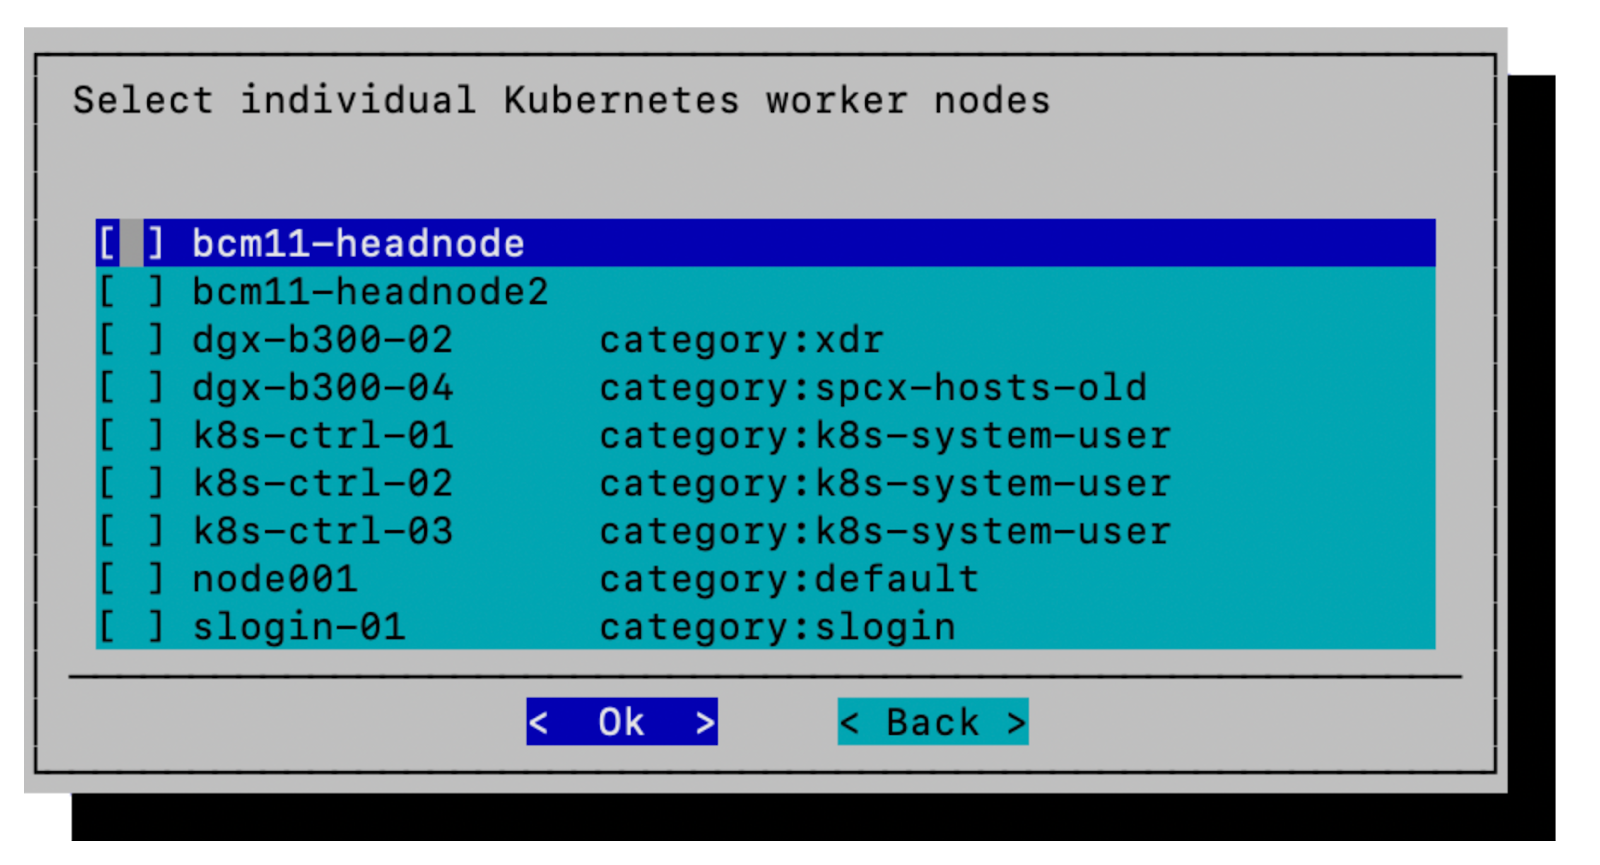
14. Skip the selection of individual Kubernetes worker nodes (the category selected in the previous step will be used instead). The screenshot below is for illustration - the correct category at this step should be `k8s-system-user`. See the [BCM node categories](/self-hosted/2.23/getting-started/installation/bcm-install/preparations.md#bcm-node-categories) section for more information. Click **Ok** to proceed:
{% hint style="info" %}
**Note**
In the combined steps 13 and 14 above, you must select from either:
* A "node category" only (as described in this guide as `k8s-system-user`)
* "Individual Kubernetes nodes" only (not generally recommended)
* Or, a combination of both
{% endhint %}
15. Select nodes for deploying [etcd](https://kubernetes.io/docs/concepts/architecture/#etcd) on. Make sure to select the same three nodes as the Kubernetes control plane nodes (Step 12). Click **Ok** to proceed:
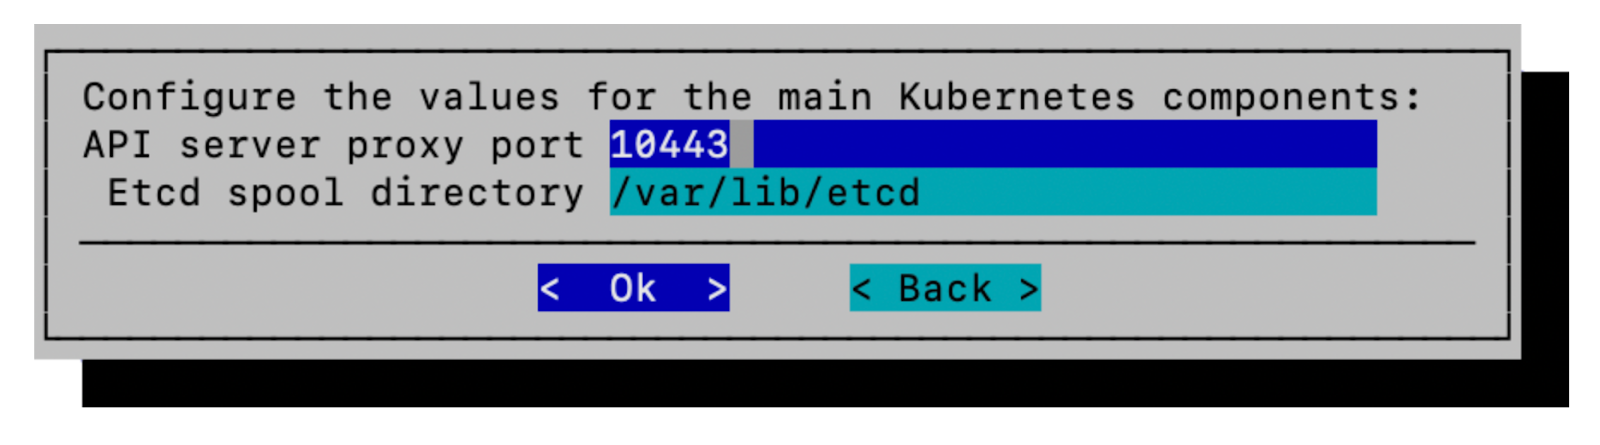
16. Leave the API server proxy port and [etcd](https://kubernetes.io/docs/concepts/architecture/#etcd) spool directory values at their prepopulated values (do not modify them). Click **Ok** to proceed:
{% hint style="info" %}
**Note**
If there are multiple Kubernetes clusters being managed by BCM (such as in the case of DGX GB200 and GB300 SuperPODs), the default proxy port value will automatically be incremented to avoid an overlap with existing clusters and may not match the screenshot.
{% endhint %}
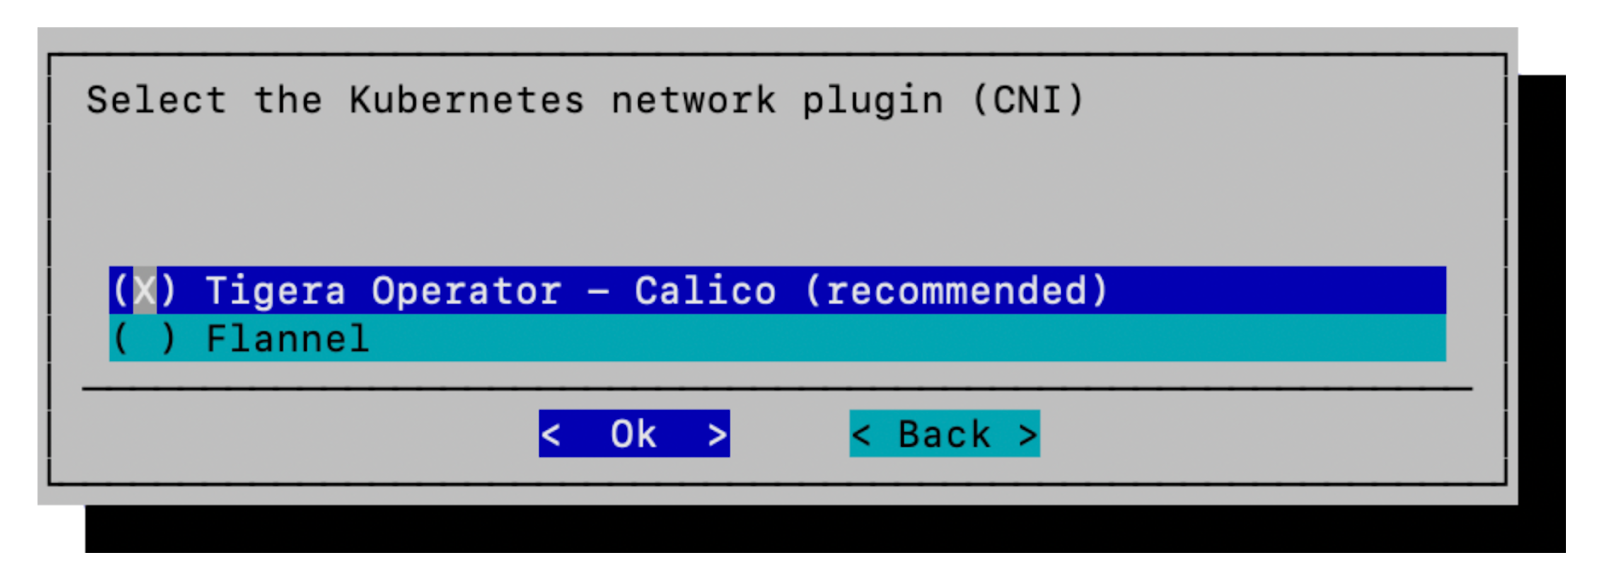
17. Select **Calico** as the Kubernetes network plugin. Click **Ok** to proceed:
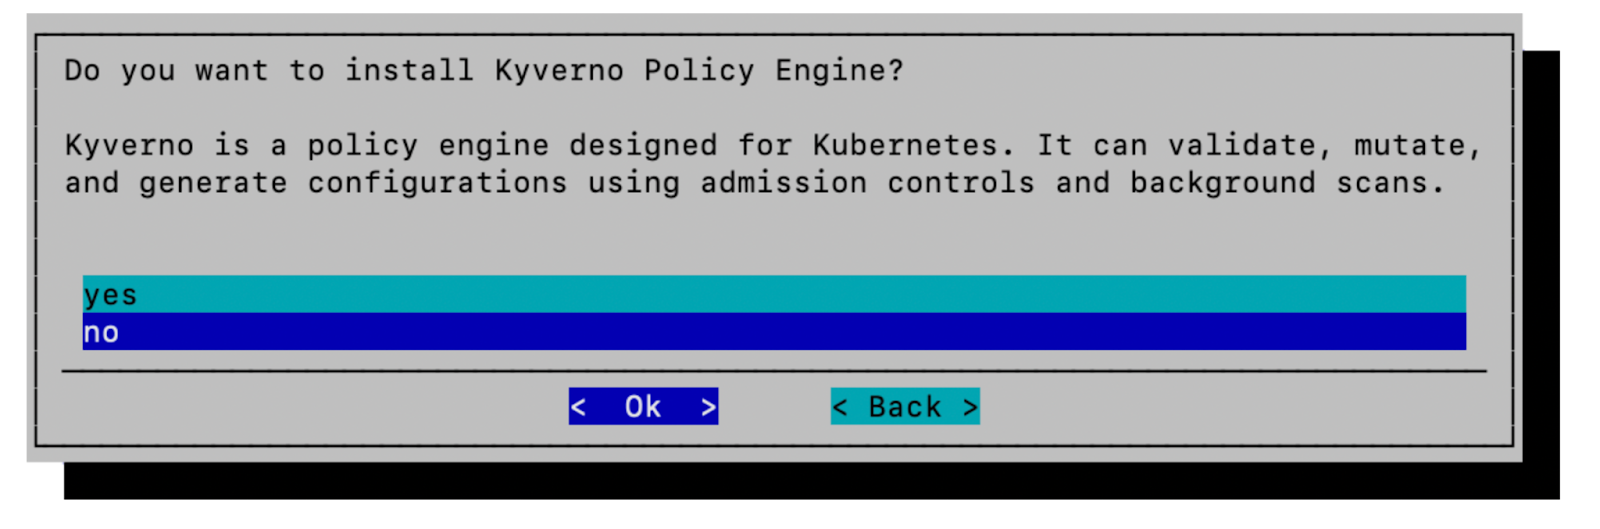
18. Select **no** to installing the **Kyverno Policy Engine** and click **Ok** to proceed:
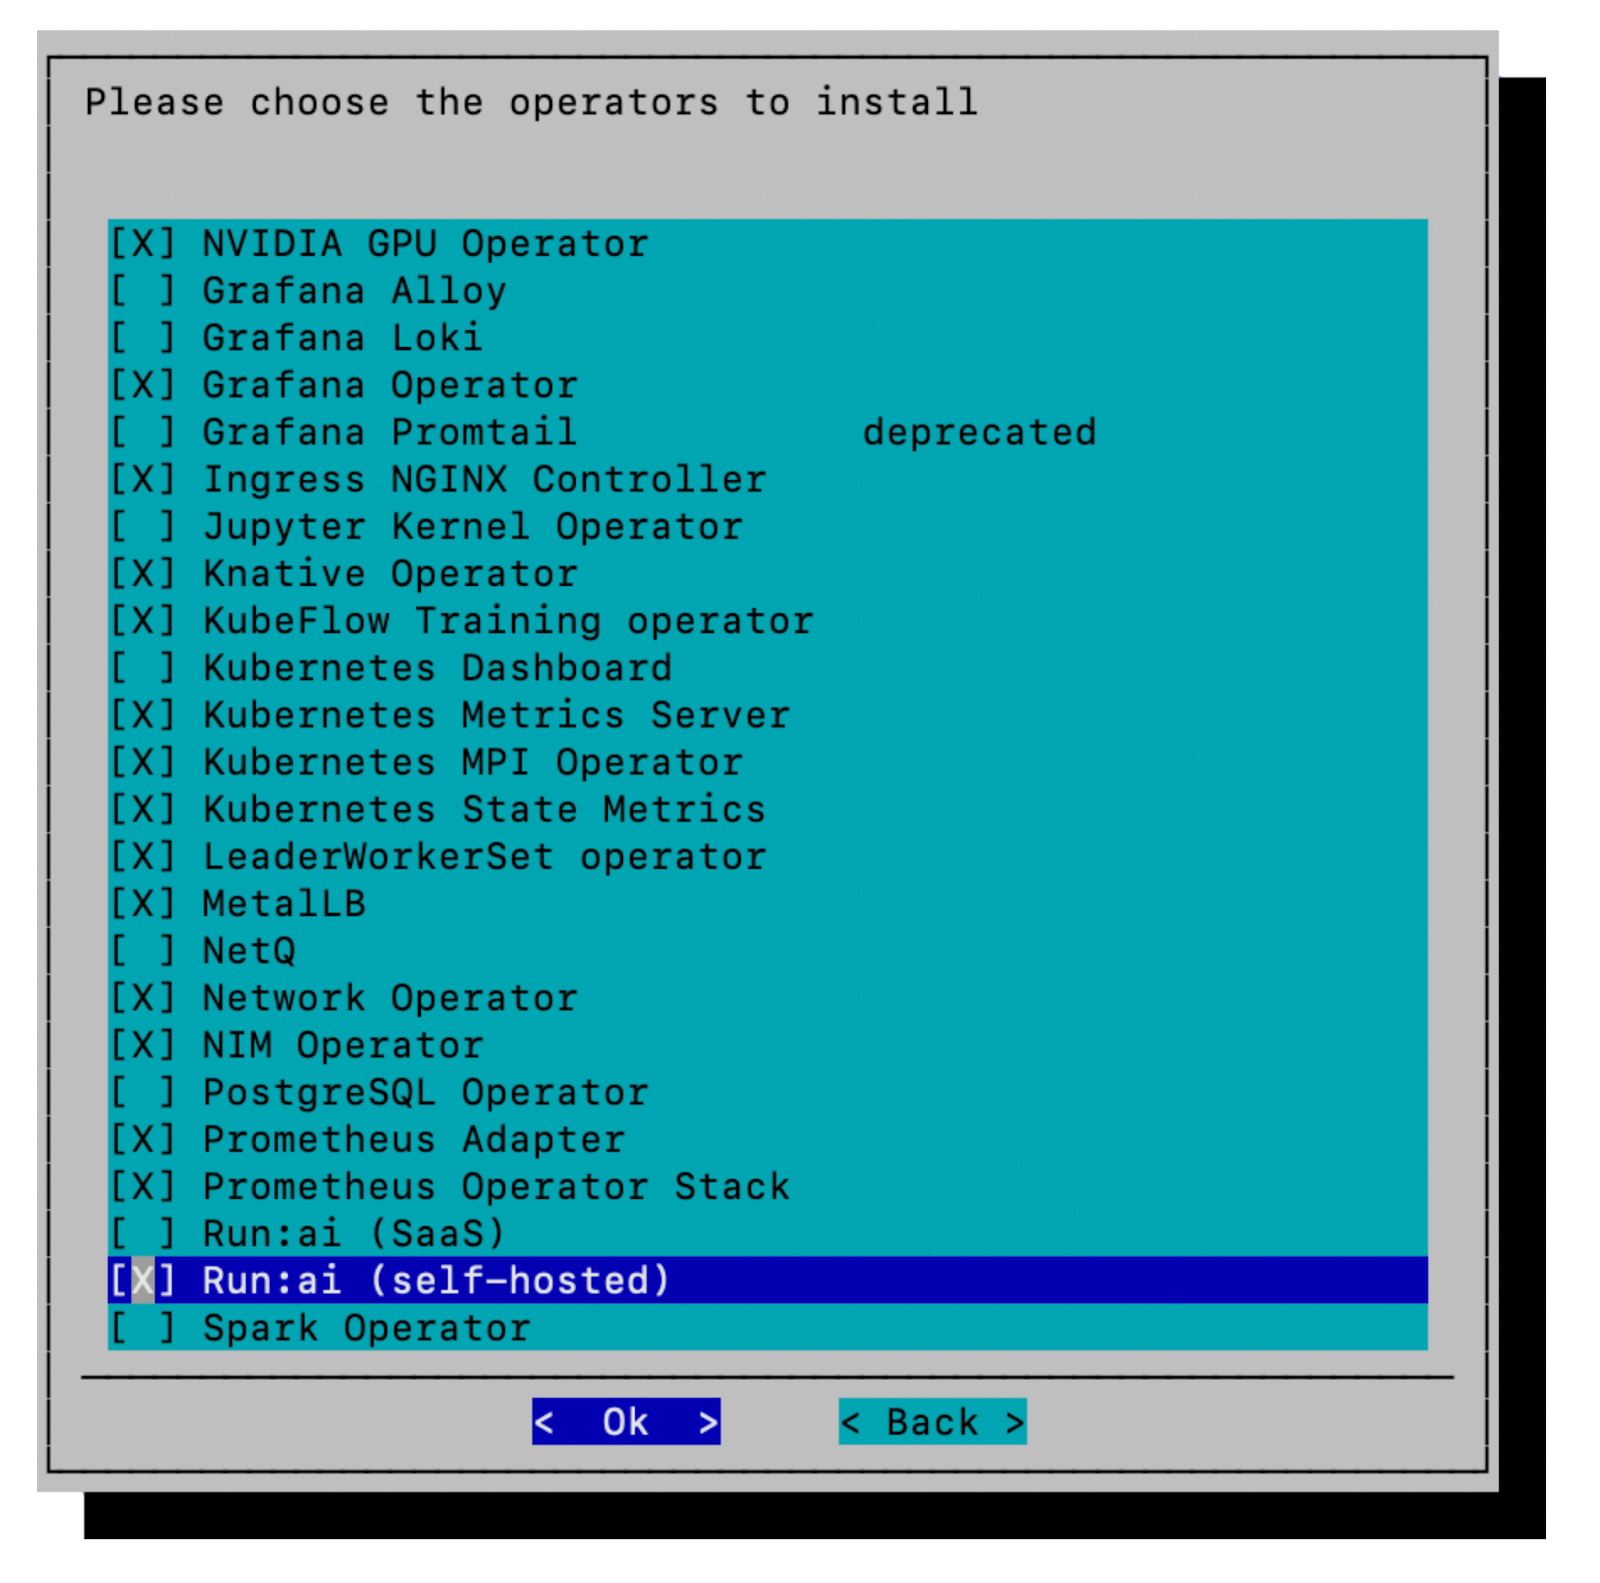
19. The components selected in this screen represent those required by NVIDIA Run:ai for a self-hosted installation. Select the operator and NVIDIA Run:ai self-hosted options as depicted below. Click **Ok** to proceed:
* NVIDIA GPU Operator
* Grafana Operator
* Ingress NGINX Controller
* Knative Operator
* Kubeflow Training Operator
* Kubernetes Metrics Server
* Kubernetes MPI Operator
* Kubernetes State Metrics
* LeaderWorkerSet Operator
* MetalLB
* Network Operator
* NIM Operator (optional)
* Prometheus Adapter
* Prometheus Operator Stack
* Run:ai (self-hosted)
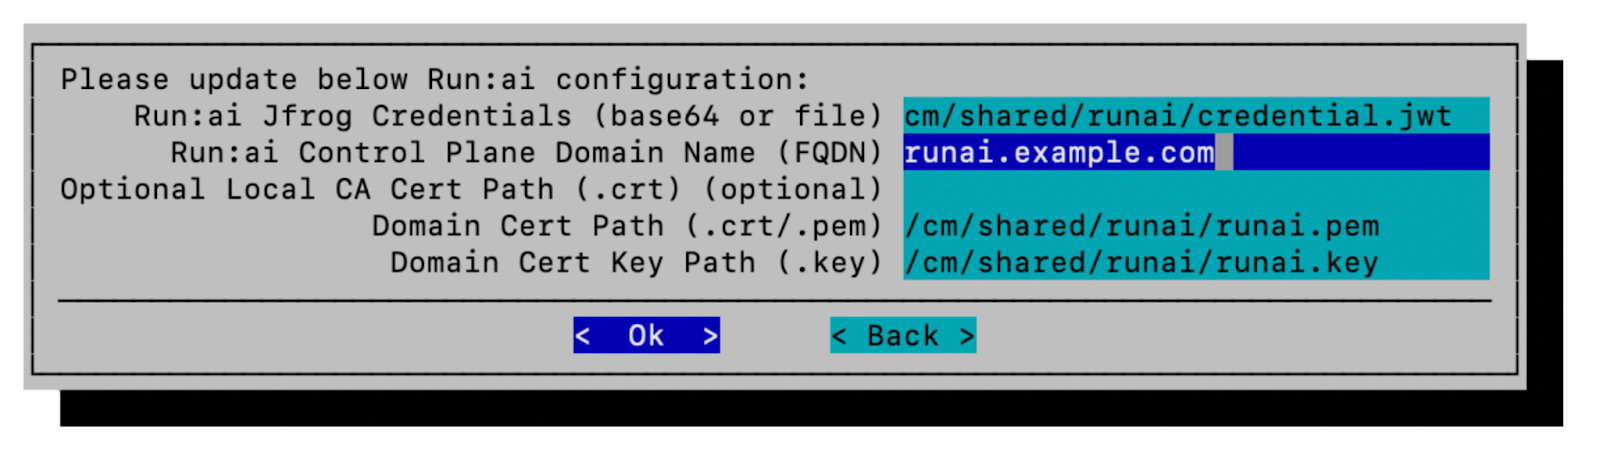
20. Provide the NVIDIA Run:ai configuration with the below and click **Ok** to proceed:
* **Run:ai Registry Credentials** - Enter the path to a file containing the base64-encoded NVIDIA token. Alternatively the Base64 encoded value can be pasted in directly.
* **Run:ai Control Plane Domain Name (FQDN)** - Enter the NVIDIA Run:ai control plane's fully qualified domain name (e.g., `runai.example.com`). This value should be different from the FQDN entered on the first "Insert basic values" Kubernetes setup in Step 9. It should be what was used when creating certificates (and should not be the same as the BCM head node hostname).
* **Local CA Cert Path (.crt or .pem)** - Path to the root CA certificate file if you are using a local CA–issued certificate (common in testing or internal environments). It's optional if using a certificate from a public CA.
* **Domain Cert Path (.crt/.pem)** - Path to the full-chain certificate for your domain (the domain's leaf certificate followed by any intermediate certificates).
* **Domain Cert Key Path (.key)** - Path to the private key that matches the domain certificate.
{% hint style="info" %}
**Note**
It's recommended to save all certificates, configuration files, and deployment artifacts into a persistent and accessible location in case of redeployment. The `/cm/shared/runai/` directory referred to in this guide resides on a shared mount point and would be a suitable location. See the [TLS certificates](/self-hosted/2.23/getting-started/installation/bcm-install/preparations.md#tls-certificates) section for additional clarification.
{% endhint %}
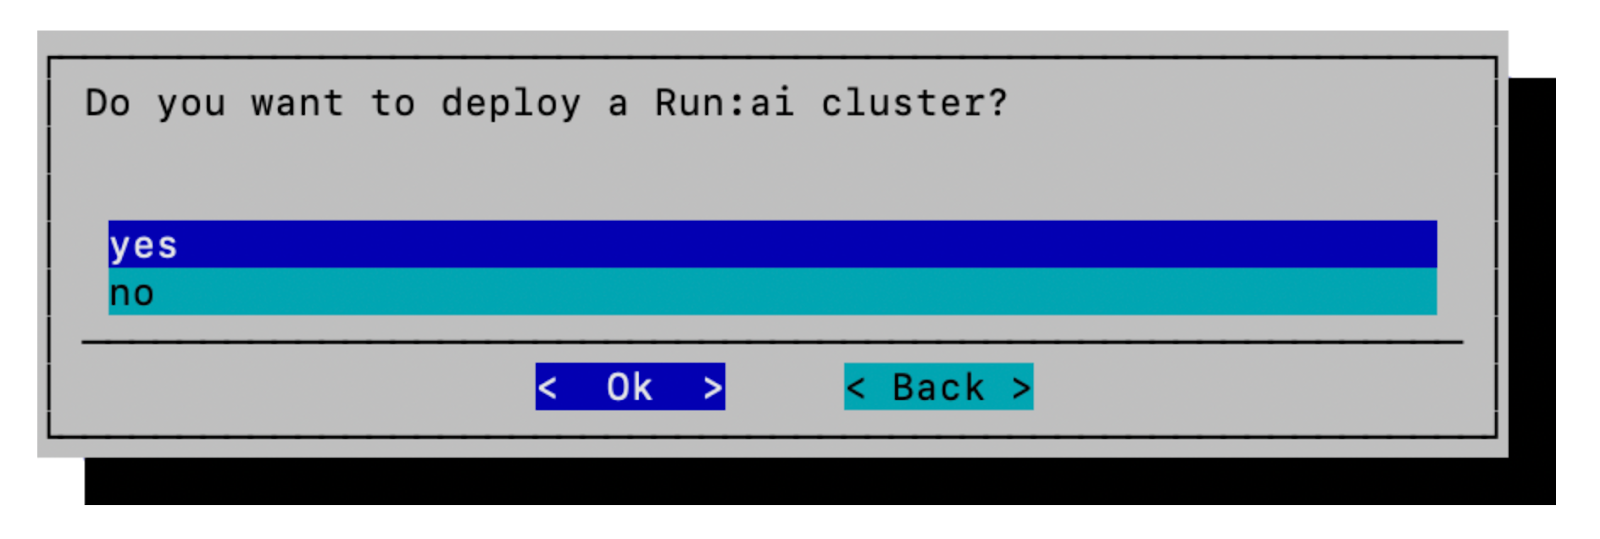
21. Select **yes** to install NVIDIA Run:ai components. Click **Ok** to proceed:
{% hint style="info" %}
**Note**
In this version of the BCM installation assistant, a warning dialog indicating an ssh issue will follow - disregard and click **Ok** to proceed. Other indications at this stage may indicate a problem with the certs supplied.
{% endhint %}
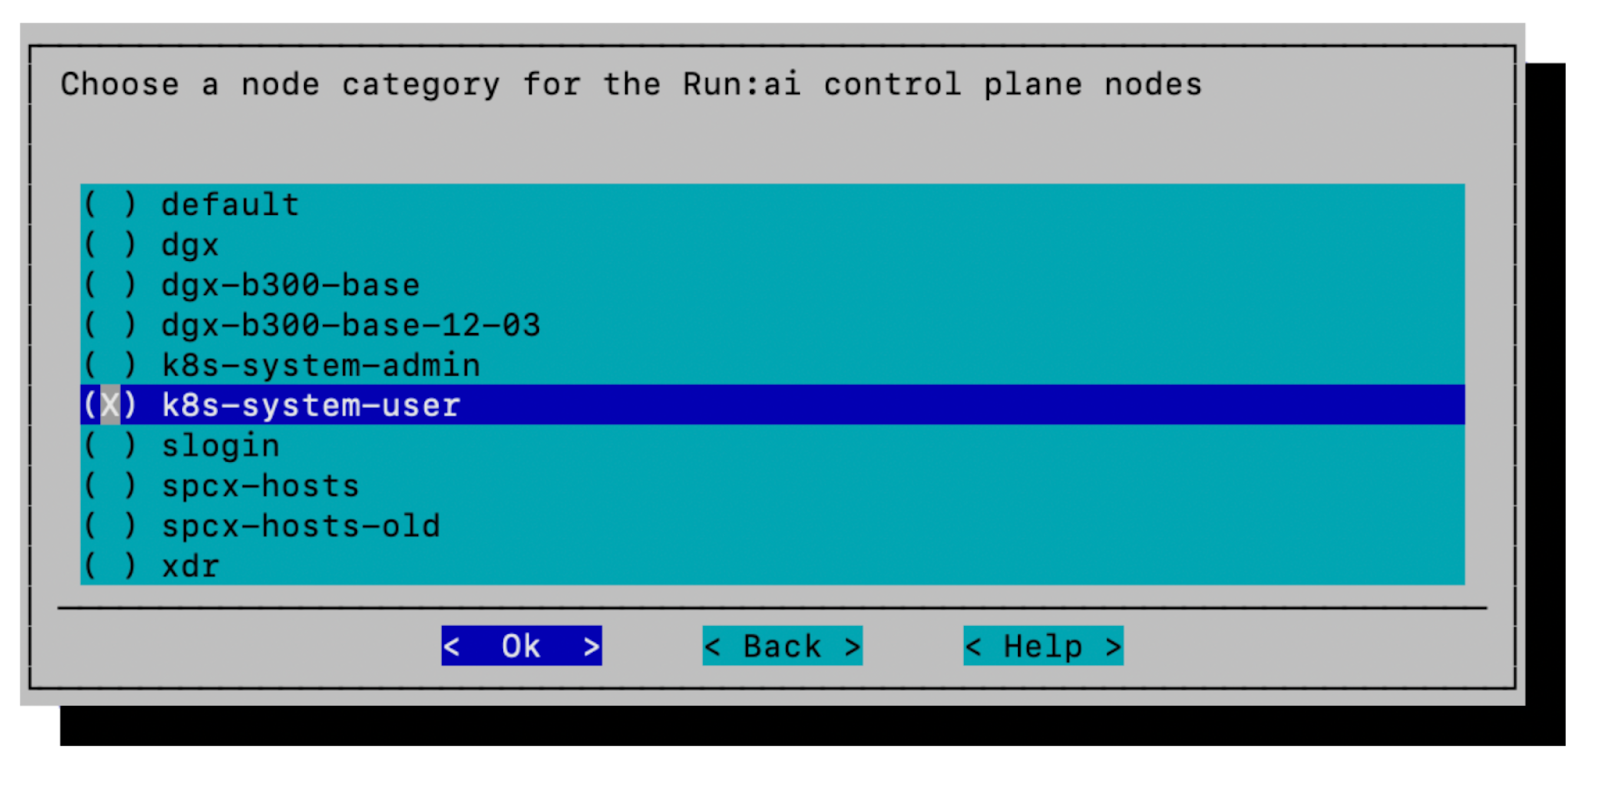
22. Select the `k8s-system-user` node category for the NVIDIA Run:ai control plane nodes and click **Ok** to proceed:
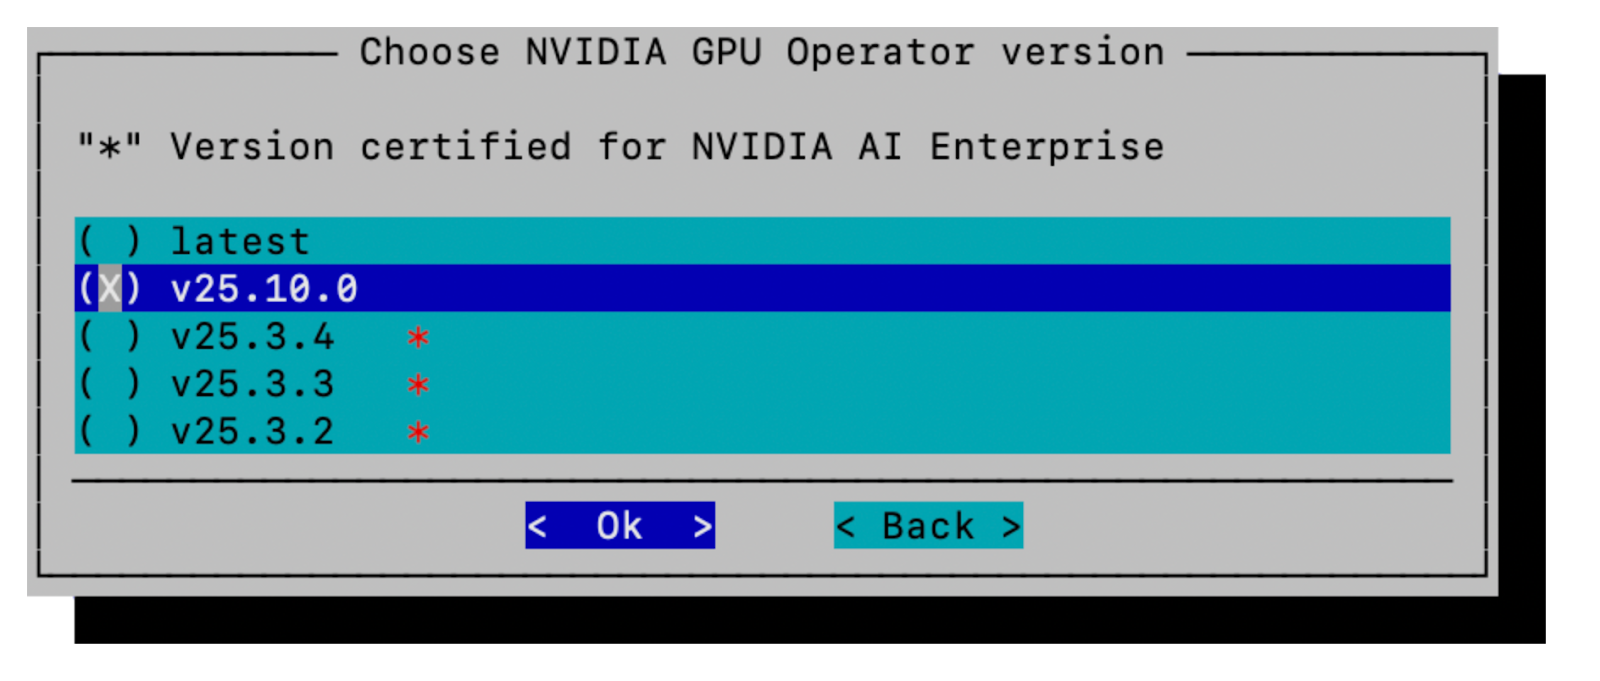
23. Select the required **NVIDIA GPU Operator** version (v25.10.0). Click **Ok** to proceed:
24. Select the required **Network Operator** (v25.7.0) version. Click **Ok** to proceed:
25. Select the required **NVIDIA Run:ai version** (v2.23.x). Click **Ok** to proceed:
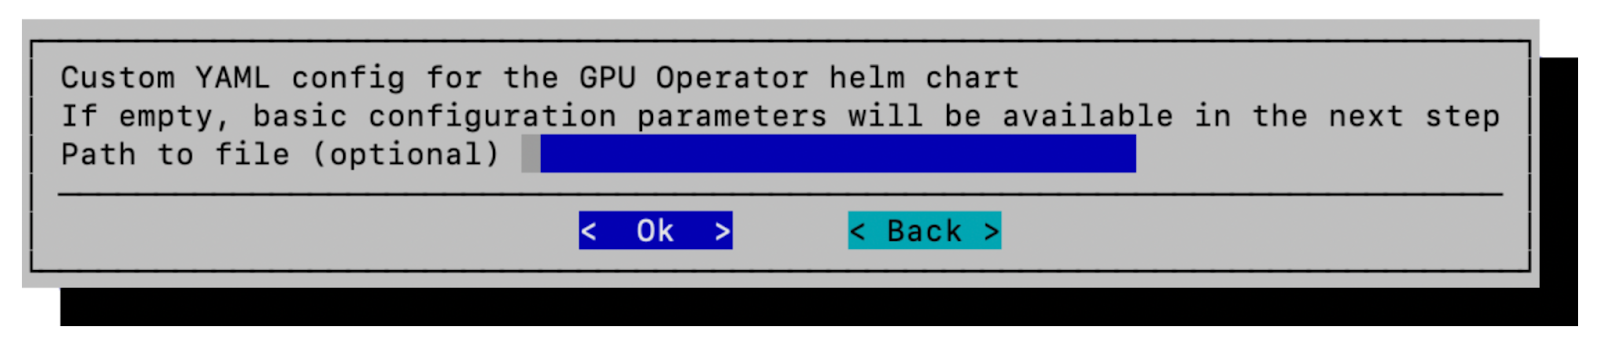
26. When prompted to supply a **Custom YAML config** for the GPU Operator leave the default (blank) and click **Ok** to proceed:
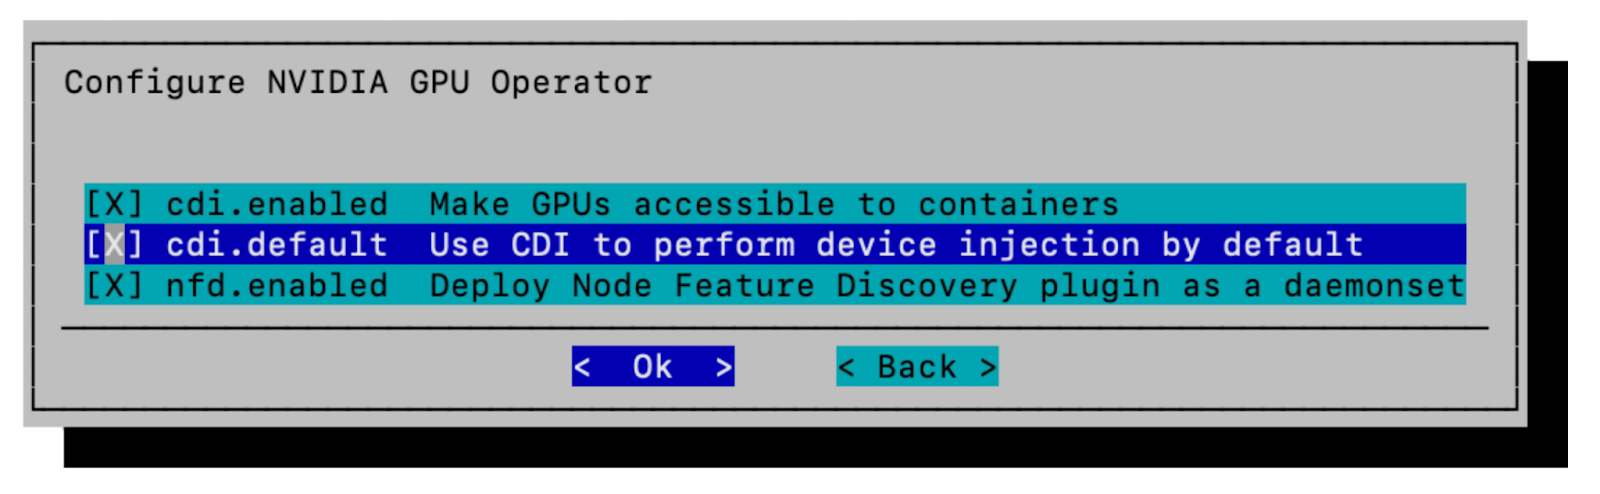
27. Configure the NVIDIA GPU Operator by selecting the following configuration parameters. Click **Ok** to proceed:
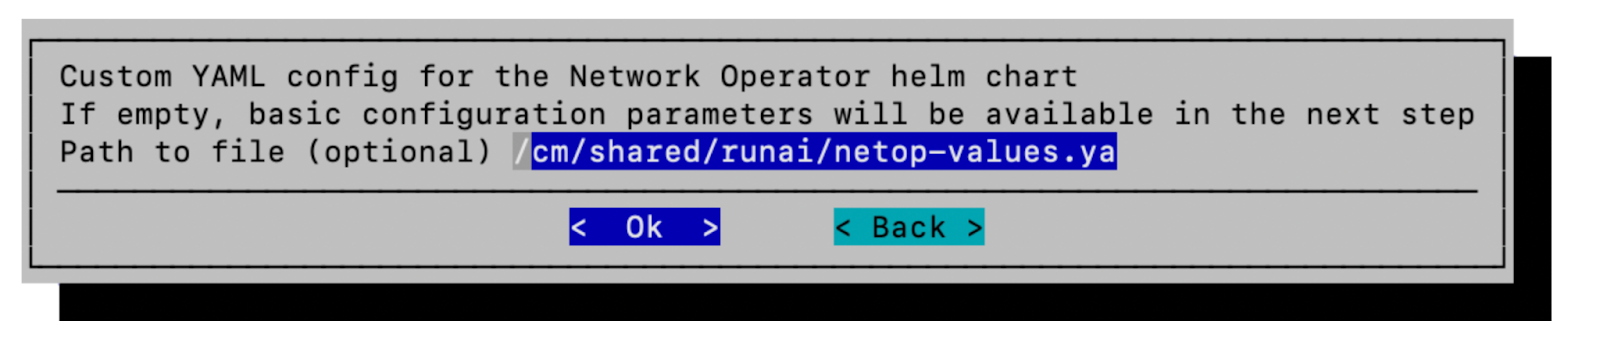
28. Supply the path to the `netop-values.yaml` file that was created in Step 3. Click **Ok** to proceed:
29. Select **Do not use pre-defined** at the GPU Operator configuration step. Click **Ok** to proceed:
30. Click **Ok** for the MetalLB IP address pools page and it will automatically set up the requirements for NVIDIA Run:ai:
31. Specify the ingress IP addresses prepared as documented in the [Pre-installation checklist](/self-hosted/2.23/getting-started/installation/bcm-install/preparations.md#pre-installation-checklist) section. The mention of MetalLB here is an indication that these will be set up as part of a load balanced pool and assigned to each respective ingress. Click **Ok** to proceed:
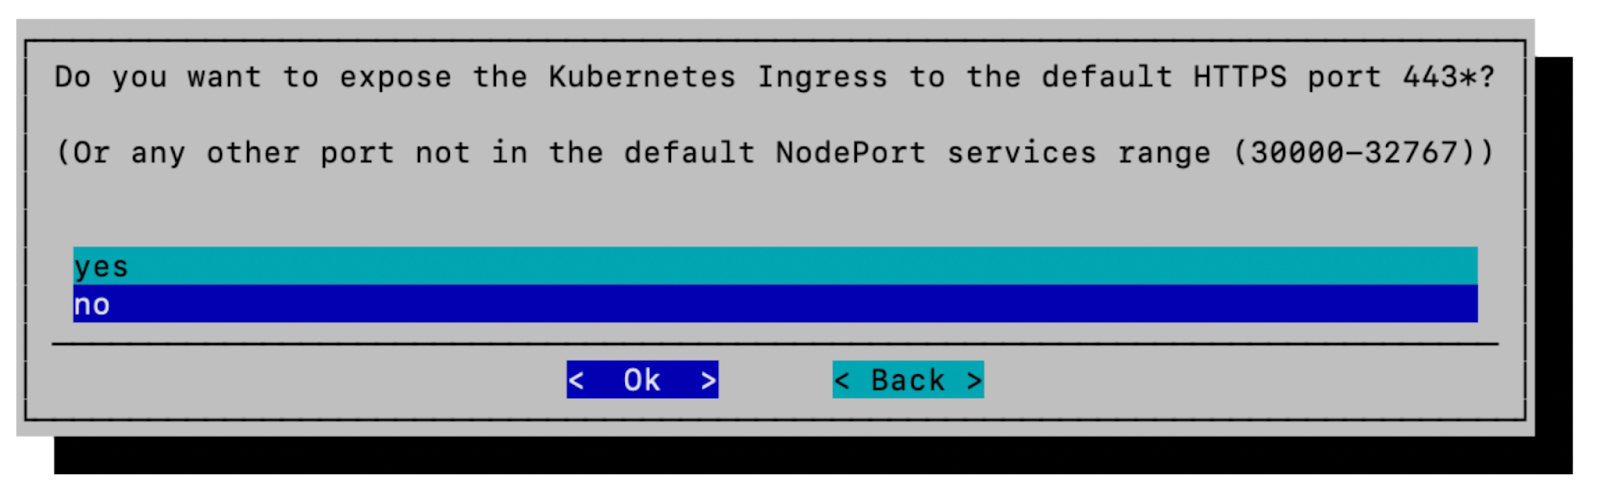
32. Select **no** to expose the **Kubernetes Ingress** to the default HTTPS port. Click **Ok** to proceed:
33. Leave the node ports for the Ingress NGINX Controller at the pre-populated values (do not modify them) and click **Ok** to proceed:
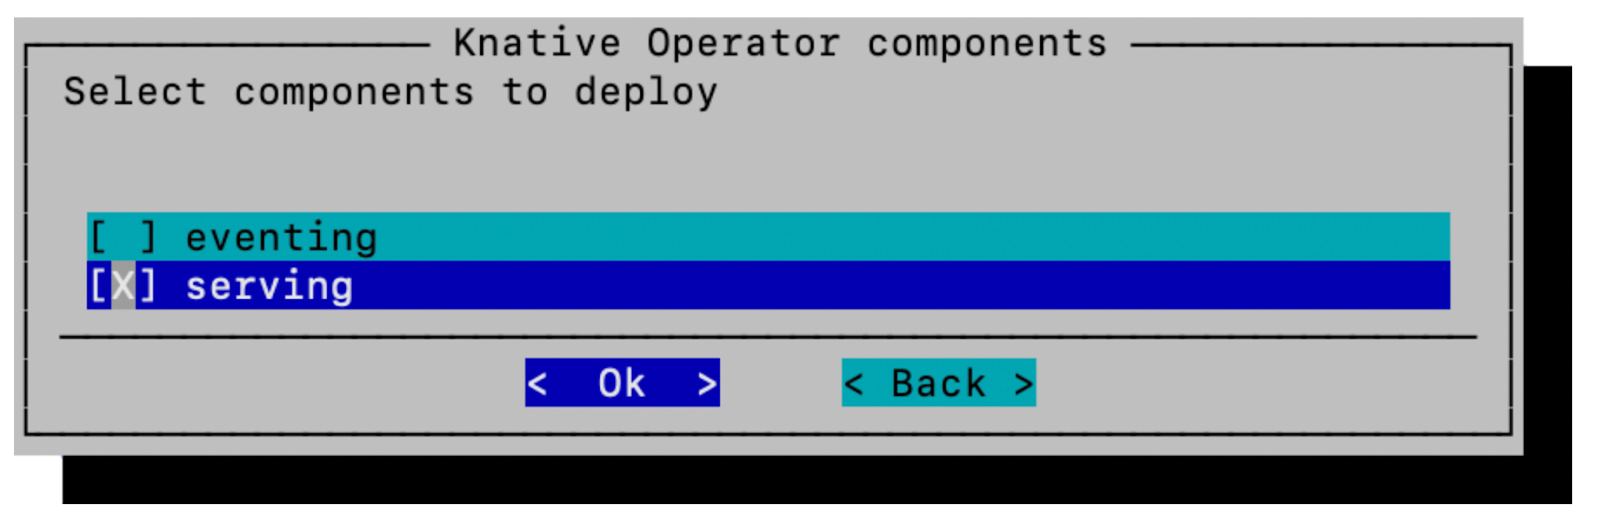
34. Select the serving option in the Knative Operator components dialog. Click **Ok** to proceed:
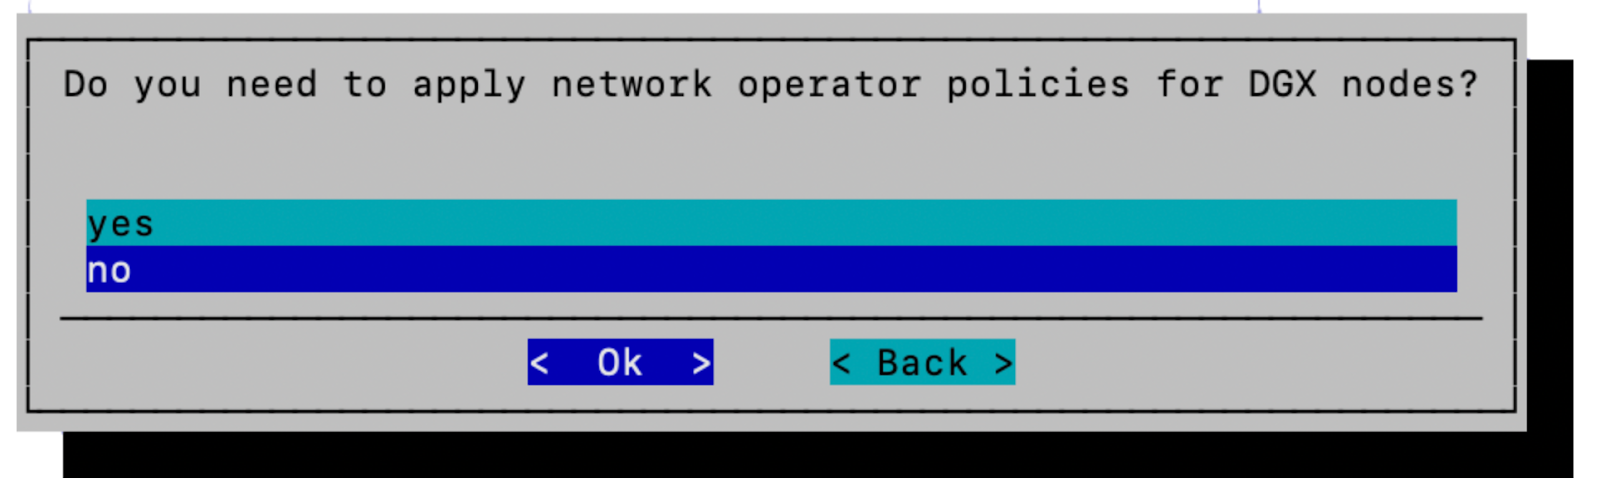
35. If deploying onto an A100 or H100 only cluster, select **yes**. If deploying on any other cluster configuration select **no**. Click **Ok** to proceed:
{% hint style="info" %}
**Note**
If applicable, Network Operator SRIOV network policies for DGX B200, DGX GB200 or later systems will be applied in a post-deployment step described below.
{% endhint %}
36. If **yes** was selected for the previous step, select the appropriate option for the cluster and click **Ok** to proceed. In certain cases, this dialog may appear even if **no** is selected at the preceding step:
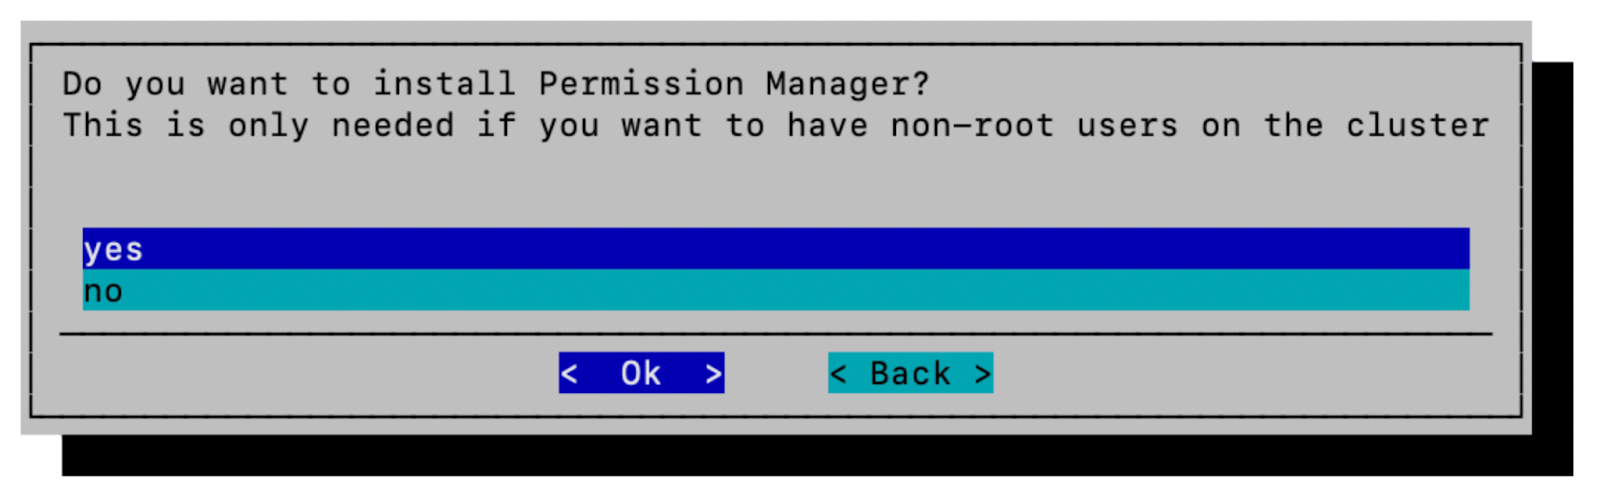
37. Select **yes** to install the **Permission Manager**. Click **Ok** to proceed:
{% hint style="info" %}
**Note**
The BCM Permission Manager coordinates security policy, system accounts, RBAC, and configures Kubernetes to employ BCM LDAP for user accounts. BCM User Accounts, however, are not automatically represented within NVIDIA Run:ai. For assistance with configuring NVIDIA Run:ai, see [Set Up SSO with OpenID Connect](/self-hosted/2.23/infrastructure-setup/authentication/sso/openidconnect.md). For more information on the BCM Permission Manager, see [Containerization Manual documentation](https://docs.nvidia.com/base-command-manager/index.html#product-manuals).
{% endhint %}
38. Select **Local path** as the Kubernetes StorageClass. Ensure that both **enabled** and **default** are specified. Click **Ok** to proceed:
{% hint style="info" %}
**Note**
The indication "local path" in the installation assistant may imply that local storage is employed, but those paths are pointing to NFS mountpoints. These were mounted as part of standard BCM node provisioning (e.g. `/cm/shared` and `/home`).
{% endhint %}
39. Configure the CSI Provider (`local-path-provisioner`) to employ shared storage (`/cm/shared/apps/kubernetes/k8s-user/var/volumes` as a default). Click **Ok** to proceed:
40. Select **yes** to enable local persistent storage for Grafana. Click **Ok** to proceed:
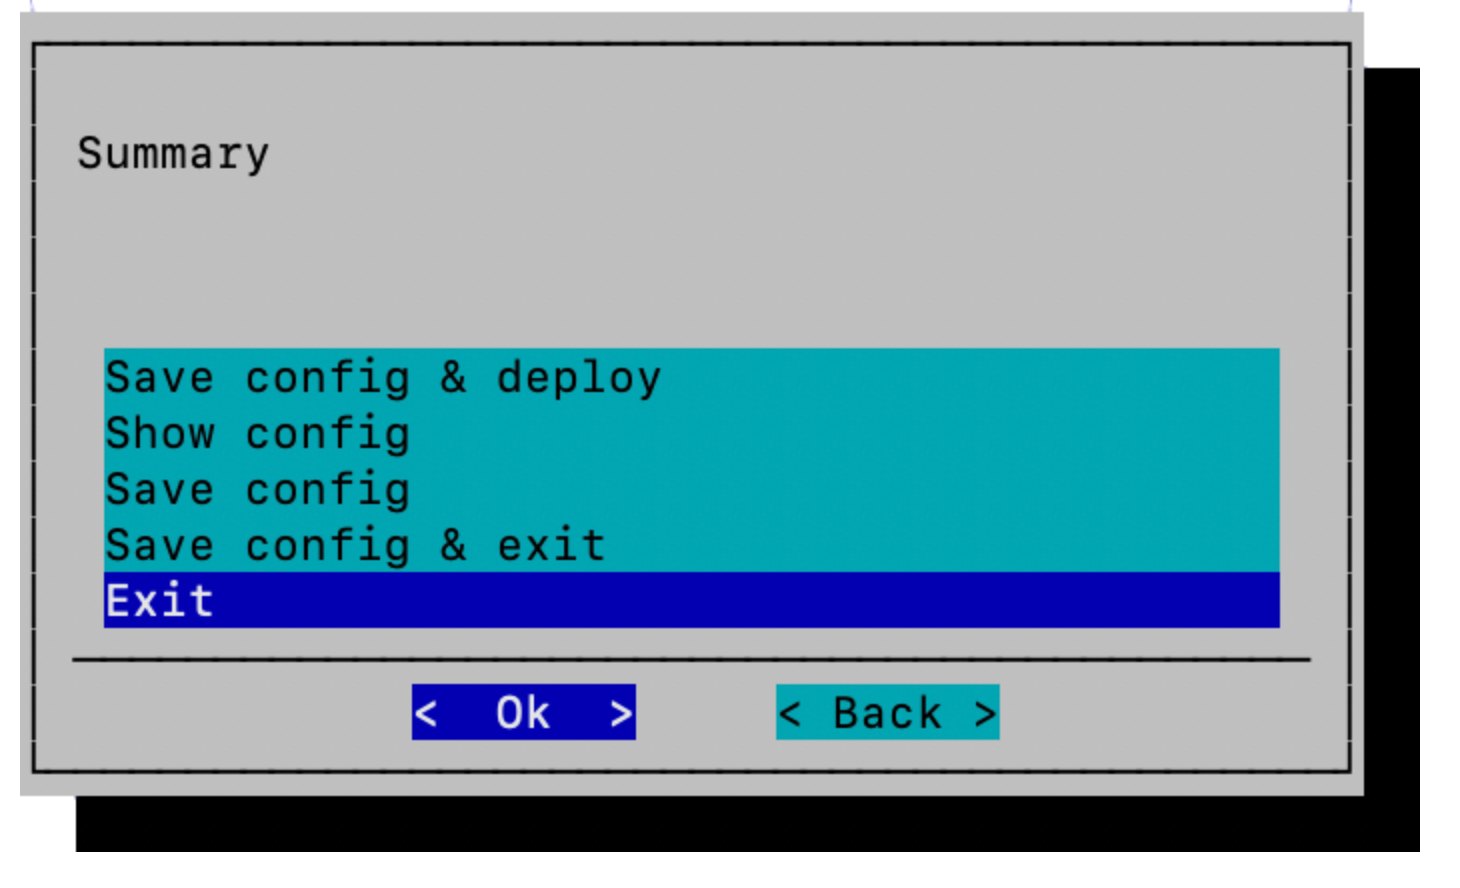
41. Select **Save config & Exit**, set an accessible location for the config file (for example: `/cm/shared/runai/cm-kubernetes-setup.conf`) with the rest of the config files, and then click **Ok**.
42. After saving the config, select **Exit** and **Ok** to complete the wizard and return to the terminal:
The deployment process may require an extended period (60+ minutes). In order to prevent potential interruptions, failures, or network outages from disrupting the deployment process it's recommended to perform the deployment from a persistent terminal session such as tmux or screen.
```sh
# Start a new screen session named "install_runai"
# This allows detach/reattaching safely during the installation
screen -S install_runai
# Inside the screen session: run the cluster setup using the configuration file
cm-kubernetes-setup -c /cm/shared/runai/cm-kubernetes-setup.conf
```
{% hint style="info" %}
**Note**
During the deployment process all nodes that are members of the new Kubernetes cluster will be rebooted.
{% endhint %}
## Connect to NVIDIA Run:ai User Interface
Upon completion of `cm-kubernetes-setup`, access NVIDIA Run:ai at the ingress IP or hostname specified earlier (e.g. [runai.example.com](http://runai.example.com)). The default NVIDIA Run:ai credentials required for login are:
* User: `test@run.ai`
* Password: `Abcd!234`
You will be prompted to change the password.
{% hint style="info" %}
**Note**
It is critical for security reasons that upon first login a new admin user is created with a secret password and the initial default credentials are changed or the test user deleted.
{% endhint %}
On first access, administrators are presented with an **optional onboarding wizard** that helps with initial setup tasks. The onboarding wizard can guide you through:
* Configuring single sign-on (SSO)
* Inviting the first research team
You can choose to **complete or skip** the onboarding wizard and perform these actions later.
After the BCM installation assistant completes, additional steps are required.
If multiple Kubernetes clusters are configured in this instance of BCM, load the correct Kubernetes module before running all post-wizard commands:
```bash
module unload kubernetes
module load kubernetes/k8s-user
```
## NVIDIA Dynamic Resource Allocation (DRA) Driver
The [NVIDIA DRA Driver for GPUs](https://docs.nvidia.com/datacenter/cloud-native/gpu-operator/latest/dra-cds.html) extends how NVIDIA GPUs are consumed within Kubernetes. This is required to enable secure Internode Memory Exchange (IMEX) on Multi-Node NVLink (MNNVL) systems (e.g. GB200, GB300) for Kubernetes workloads and should be included with all NVIDIA GPU systems.
1. Install using Helm:
```bash
helm repo add nvidia https://helm.ngc.nvidia.com/nvidia \
&& helm repo update
helm install nvidia-dra-driver-gpu nvidia/nvidia-dra-driver-gpu \
--version="25.8.0" \
--create-namespace \
--namespace nvidia-dra-driver-gpu \
--set nvidiaDriverRoot=/ \
--set resources.gpus.enabled=false
```
{% hint style="warning" %}
**NGC image pull secret (bandwidth tests only)**
The bandwidth tests — `dra-computedomain-test.yaml` and `ib-bandwidth-test.yaml` — pull the entitled `nvcr.io/nvidia/nv-mission-control/nvbandwidth` image and reference an image pull secret named `ngc-nvcr`. Before applying either, create that secret in the `default` namespace (replace `` with a valid NGC key):
```bash
kubectl create secret docker-registry ngc-nvcr \
--docker-server=nvcr.io \
--docker-username='$oauthtoken' \
--docker-password='' \
-n default
```
The NCCL tests (`ib-nccl-test.yaml`, `roce-nccl-test.yaml`) use the public `nvcr.io/nvidia/pytorch` image and do not need this secret.
{% endhint %}
2. **Multi-Node NVLink (MNNVL) platforms (e.g. GB200, GB300) only** - Create a `dra-computedomain-test.yaml` file in `/cm/shared/runai` from the [Validation tests](/self-hosted/2.23/getting-started/installation/bcm-install/validation-tests.md). The test co-locates its worker pods within a single NVL clique automatically via `podAffinity` with `topologyKey: nvidia.com/gpu.clique`, so there is no clique ID to edit for a single-rack NVL72 cluster. For multi-rack systems, adjust the `podAffinity` `topologyKey` to match your topology:
```bash
# Optional: inspect the NVL clique labels on the GPU nodes
kubectl describe nodes | grep nvidia.com/gpu.clique=
> nvidia.com/gpu.clique=f84d133c-bbc9-55fd-b1ff-ffffc7ef6783.23322
# For MNNVL platforms (e.g. GB200 & GB300)
kubectl apply -f /cm/shared/runai/dra-computedomain-test.yaml
```
3. **Multi-Node NVLink (MNNVL) platforms (e.g. GB200, GB300) only** - Validate the test successfully completed and inspect the logs of the launcher:
# For MNNVL platforms (e.g. GB200 & GB300)
   kubectl get pods
   > NAME                              READY   STATUS      RESTARTS   AGE
   > nvbandwidth-test-launcher-snb82   0/1     Completed   0          72s

   kubectl logs nvbandwidth-test-launcher-snb82
4. **Multi-Node NVLink (MNNVL) platforms (e.g. GB200, GB300) only** - Cleanup test:
```bash
# For MNNVL platforms (e.g. GB200 & GB300)
kubectl delete -f dra-computedomain-test.yaml
```
### Enable DRA and Multi-Node NVLink
The default NVIDIA Run:ai configuration does not expose DRA features. After installing the DRA components, this can be enabled by modifying the `runaiconfig` in the cluster. See [Advanced cluster configurations](/self-hosted/2.23/infrastructure-setup/advanced-setup/cluster-config.md) for more details:
```yaml
# Edit the runaiconfig object to toggle GPUNetworkAccelerationEnabled
# to true and adjust tolerations for the Kubernetes control plane
kubectl patch runaiconfig runai \
-n runai \
--type='merge' \
-p '{
"spec": {
"workload-controller": {
"GPUNetworkAccelerationEnabled": true
},
"global": {
"tolerations": [
{
"key": "node-role.kubernetes.io/control-plane",
"operator": "Exists",
"effect": "NoSchedule"
}
]
}
}
}'
```
Instructions for validating the change and reverting if necessary:
```yaml
# Validate the patch was applied successfully
kubectl get runaiconfig runai \
-n runai \
-o custom-columns=GPUAccelEnabled:.spec.workload-controller.GPUNetworkAccelerationEnabled,Tolerations:.spec.global.tolerations
# To revert the runaiconfig object change
kubectl patch runaiconfig runai -n runai --type='merge' -p '{
"spec": {
"workload-controller": {
"GPUNetworkAccelerationEnabled": false
},
"global": {
"tolerations": null
}
}
}'
```
## Configure the Network Operator
In version 11.32.1 of the BCM installation assistant, the Network Operator requires additional configuration on DGX B200 / GB200 & B300 / GB300 SuperPOD / BasePOD systems. While the operator is installed in a preceding step, it does not automatically initialize or configure SR-IOV and secondary network plugins.
The following CRD resources have to be created in the exact order as below:
* SR-IOV Network Policies for each NVIDIA InfiniBand NIC
* An nvIPAM IP address pool
* SR-IOV InfiniBand networks
1. Create SR-IOV network node policies using the `nic-cluster-policy.yaml` that was created in an earlier step:
```bash
# DGX GB300 Example - substitute policy name as appropriate
kubectl apply -f /cm/shared/runai/nic-cluster-policy-gb300.yaml
```
2. Create an IPAM IP Pool using the `combined-ippools.yaml` that was created in an earlier step:
```bash
# DGX GB300 Example - substitute policy name as appropriate
kubectl apply -f /cm/shared/runai/combined-ippools-gb300.yaml
```
3. Create the SR-IOV IB networks using the `combined-sriovbnet.yaml` that was created in an earlier step:
```bash
# DGX GB300 Example - substitute policy name as appropriate
kubectl apply -f /cm/shared/runai/combined-sriovibnet-gb300.yaml
```
4. Create the SR-IOV Node Pool configuration using the `sriov-node-pool-config.yaml` appropriate for the DGX platform:
```bash
kubectl apply -f /cm/shared/runai/sriov-node-pool-config.yaml
```
{% hint style="info" %}
**Note**
This will typically reconfigure NICs and may result in a node reboot. The supplied YAML sets the maxUnavailable field to 20%. This value should be adjusted to align with your operational requirements. A value of 1 would have the effect of serializing the upgrade and would result in blocking upon a single node failure. It may be appropriate for a small lab deployment to set it to 100%. This would prevent any single machine failure from blocking the remaining nodes from upgrading. For larger clusters, setting the value to a lower percentage means that the upgrade process will be effectively split into batches.
{% endhint %}
5. Validate by describing one of the DGX nodes and checking for SRIOV devices:
```bash
# Describe a DGX worker node
kubectl describe node --context=kubernetes-admin@k8s-user | grep sriovib
# Example output
nvidia.com/sriovib_resource_a: 16
nvidia.com/sriovib_resource_b: 16
nvidia.com/sriovib_resource_c: 16
nvidia.com/sriovib_resource_d: 16
# Check the state of SR-IOV Nodes
kubectl get -n network-operator sriovnetworknodestate --context=kubernetes-admin@k8s-user
# Example Output
NAME SYNC STATUS
Succeeded
```
{% hint style="info" %}
**Note**
It might take several minutes for these settings to take effect. If the `sriovnetworkconfig` daemon changes the NIC config, then a node reboot will occur.
{% endhint %}
6. Create the test file matching your platform's fabric in `/cm/shared/runai` from the [Validation tests](/self-hosted/2.23/getting-started/installation/bcm-install/validation-tests.md) page, then validate by running it. Apply only the test that matches the cluster's fabric (InfiniBand **or** Spectrum-X / RoCE), not both:
* For GB200 & GB300 (InfiniBand fabric) - [ib-bandwidth-test.yaml](https://run-ai-docs.nvidia.com/self-hosted/2.23/getting-started/installation/bcm-install/pages/tuzZWVbbe8MtSib0MKai#infiniband-sr-iov-bandwidth-tests-ib-bandwidth-test.yaml) (requires the `ngc-nvcr` image pull secret created in the DRA driver section above):
```bash
# DGX GB200 & GB300
kubectl apply -f /cm/shared/runai/ib-bandwidth-test.yaml -n default
```
* For B200 & B300 (InfiniBand fabric) - [ib-nccl-test.yaml](https://run-ai-docs.nvidia.com/self-hosted/2.23/getting-started/installation/bcm-install/pages/tuzZWVbbe8MtSib0MKai#infiniband-sr-iov-nccl-tests-ib-nccl-test.yaml):
```bash
# DGX B200 & B300 configured for InfiniBand
kubectl apply -f /cm/shared/runai/ib-nccl-test.yaml -n default
# Clean up after validating
kubectl delete -f /cm/shared/runai/ib-nccl-test.yaml -n default
```
* For B300 SuperPOD with Spectrum-X (RoCE Ethernet fabric) - [roce-nccl-test.yaml](https://run-ai-docs.nvidia.com/self-hosted/2.23/getting-started/installation/bcm-install/pages/tuzZWVbbe8MtSib0MKai#spectrum-x-roce-nccl-tests-roce-nccl-test.yaml):
```bash
# DGX B300 SuperPOD configured for Spectrum-X (RoCE)
kubectl apply -f /cm/shared/runai/roce-nccl-test.yaml -n default
# Clean up after validating
kubectl delete -f /cm/shared/runai/roce-nccl-test.yaml -n default
```
{% hint style="info" %}
**Spectrum-X (RoCE) deployments**
The InfiniBand tests above target the InfiniBand fabric. DGX systems configured for NVIDIA Spectrum-X Ethernet (RoCE) — for example DGX B300 SuperPOD deployments using Spectrum-X — use a different fabric: run the [roce-nccl-test.yaml](https://run-ai-docs.nvidia.com/self-hosted/2.23/getting-started/installation/bcm-install/pages/tuzZWVbbe8MtSib0MKai#spectrum-x-roce-nccl-tests-roce-nccl-test.yaml) test (the Spectrum-X bullet above) instead of the InfiniBand tests. Do not run the InfiniBand tests on a Spectrum-X / RoCE-configured cluster, and do not run the RoCE test on an InfiniBand cluster.
{% endhint %}
{% hint style="info" %}
**Note**
The Network Operator will restart the DGX nodes if the number of Virtual Functions in the SR-IOV Network Policy file does not match the NVIDIA/Mellanox firmware configuration.
{% endhint %}
## (Optional) Apply Security Policies
By default, BCM Kubernetes deployment has permissive security policies to ease in development environments. For production clusters or in secure environments, it's recommended to take additional steps to harden the cluster. This includes steps such as configuring permission manager, applying Kyverno policies, and applying Calico policies.
For deployments of NVIDIA Run:ai as a part of NVIDIA Mission Control, please reach out to your NVIDIA representative for the latest example configurations and suggested policies. The Mission Control software installation guide's [Kubernetes Security Hardening](https://docs.nvidia.com/mission-control/docs/nmc-software-installation-guide/2.0.0/nmc-kube-security-guide.html) documentation provides guidance for application and links for obtaining the latest policy manifests.
## (Optional) Create Node Pools
See [Node pools](/self-hosted/2.23/platform-management/aiinitiatives/resources/node-pools.md) to create and manage groups of nodes (either by predefined node label or administrator-defined node labels). This optional configuration step can be used for advanced deployment scenarios to allocate different resources across teams or projects.
## (Optional) Add Additional Users
See [Users](/self-hosted/2.23/infrastructure-setup/authentication/users.md) for steps on adding additional users beyond the initially created account or configuring SSO authentication.
## (Optional) Install the NVIDIA Run:ai Command Line Tool
To obtain the command line binary, see the [Install and configure CLI](/self-hosted/2.23/reference/cli/install-cli.md) section.
### Test the Command Line Tool Installation
Validate the installation by running the following command:
```bash
runai version
```
{% hint style="info" %}
**Note**
If NVIDIA Run:ai had previously been installed via BCM, it may be necessary to update the command line version.
{% endhint %}
### Set the Control Plane URL
The following step is required for Windows users only. Linux and Mac clients are configured via the installation script.
Run the following command (substituting the NVIDIA Run:ai control plane FQDN value specified in previous steps) to create the `config.json` file in the default path:
```bash
runai config set --cp-url runai.example.com
```
Alternatively, the Base Command Manager installation assistant can generate this config with the following steps:
To validate the installation, please refer to the quick start guides for deploying single-GPU training jobs, multi-node training jobs, single-GPU inference jobs, and multi-GPU inference jobs. Certain NGC workloads may require adding an NGC API key and docker credentials into the cluster as an image pull secret; see the image pull secret instructions in [Validation tests](/self-hosted/2.23/getting-started/installation/bcm-install/validation-tests.md).
1. Validate the ingress IP for NVIDIA Run:ai inference is configured. `EXTERNAL-IP` should have the value configured in the prior MetalLB steps:
```bash
kubectl get svc -n knative-serving kourier -o wide
NAME TYPE CLUSTER-IP EXTERNAL-IP PORT(S) AGE
kourier LoadBalancer x.x.x.x 10.1.1.26 80:31038/TCP,443:30783/TCP 8h
```
2. Validate distributed training workloads, see [Run your first distributed training workload](/self-hosted/2.23/workloads-in-nvidia-run-ai/using-training/distributed-training/quick-starts/distributed-training-quickstart.md).
3. Validate distributed inference workloads, see [Run your first custom inference workload](/self-hosted/2.23/workloads-in-nvidia-run-ai/using-inference/quick-starts/inference-quickstart.md).
## Troubleshooting Common Issues
Slow installation
Provide a registry mirror when requested in the wizard. If one isn't available, authenticated access to Docker Hub can avoid potential [rate limiting](https://docs.docker.com/docker-hub/usage/pulls/) for at least some of the artifact pulls:
```bash
# Authenticate to Docker Hub prior to running cm-kubernetes-setup
echo -n "$DOCKERHUB_TOKEN" | docker login --username "$DOCKERHUB_USER" --password-stdin
```
Delayed responsiveness from the cmsh command
If encountering slow response when running the `cmsh` command, try using the `cmsh-lazy-load` command (substituting it for cmsh wherever referenced in the above deployment steps).
```sh
# Example: use of cmsh-lazy-load as substitute for cmsh
cmsh-lazy-load -c "device list; quit"
```
Failed installation
If encountering issues with installation failure (which should be evident immediately) ensure that the DGX node kernel parameters are not inadvertently forcing [Cgroup v1 vs Cgroup v2](https://kubernetes.io/blog/2024/08/14/kubernetes-1-31-moving-cgroup-v1-support-maintenance-mode/):
```bash
# the following kernel parameters should not be present
systemd.unified_cgroup_hierarchy=0 systemd.legacy_systemd_cgroup_controller
```
Shared Storage (NFS) configuration
If encountering issues indicating problems consistently accessing Persistent Volumes (PVs) ensure that NFSv3 for `/cm/shared` for both of the node categories that'll be used later in this guide. For example (please substitute the category name as appropriate for the DGX type):
```sh
# Force NFSv3 for the worker node category
cmsh -c "category use dgx-gb200-k8s; fsmounts; use /cm/shared; set mountoptions defaults,_netdev,vers=3; commit; quit"
# Force NFSv3 on the CPU nodes
cmsh -c "category use k8s-system-user; fsmounts; use /cm/shared; set mountoptions defaults,_netdev,vers=3; commit; quit"
```
MetalLB Load Balancer manual installation
Since there's shared use of CPU nodes for the combined control plane elements in this architecture, BCM configures MetalLB and adjusts node labels to run. The following would be required as a manual step when deploying MetalLB in this manner:
```bash
# Remove the exclusion preventing nodes from receiving load balancer traffic
kubectl label nodes --all node.kubernetes.io/exclude-from-external-load-balancers-
```
{% hint style="info" %}
**Note**
The above is not required when using the BCM installation assistant. It's included here to assist with alternative deployment approaches on DGX SuperPOD / BasePOD.
{% endhint %}
NVIDIA Run:ai exact version selection
The BCM installation assistant will pull the latest NVIDIA Run:ai patch release available for the minor version selected. The following can be used to indicate which version will be installed:
```bash
helm repo add runai https://runai.jfrog.io/artifactory/cp-charts-prod
helm repo update
helm search repo runai/control-plane --versions | grep "2.22"
runai-backend/control-plane 2.22.48 2.22.48 Run:ai Control Plane
```
---
# Agent Instructions
This documentation is published with GitBook. GitBook is the documentation platform designed so that both humans and AI agents can read, navigate, and reason over technical content effectively. Learn more at gitbook.com.
## Querying This Documentation
If you need additional information that is not directly available in this page, you can query the documentation dynamically by asking a question.
Perform an HTTP GET request on the current page URL with the `ask` query parameter, and the optional `goal` query parameter:
```
GET https://run-ai-docs.nvidia.com/self-hosted/2.23/getting-started/installation/bcm-install/deployment.md?ask=&goal=
```
`ask` is the immediate question: it should be specific, self-contained, and written in natural language.
`goal` is optional and describes the broader end goal you are ultimately trying to accomplish on behalf of the user. GitBook uses it to tailor the answer towards what is most useful for that goal.
The response will contain a direct answer to the question and relevant excerpts and sources from the documentation.
Use this mechanism when the answer is not explicitly present in the current page, you need clarification or additional context, or you want to retrieve related documentation sections.