
Departments
This section explains the procedure for managing departments
Departments are a grouping of projects. By grouping projects into a department, you can set quota limitations to a set of projects, create policies that are applied to the department, and create assets that can be scoped to the whole department or a partial group of descendent projects
For example, in an academic environment, a department can be the Physics Department grouping various projects (AI Initiatives) within the department, or grouping projects where each project represents a single student.
Departments
The Departments table can be found under Organization in the NVIDIA Run:ai platform.
Note
Departments are disabled, by default. If you cannot see Departments in the menu, then it must be enabled by your Administrator, under General settings → Resources → Departments
The Departments table lists all departments defined for a specific cluster and allows you to manage them. You can switch between clusters by selecting your cluster using the filter at the top.
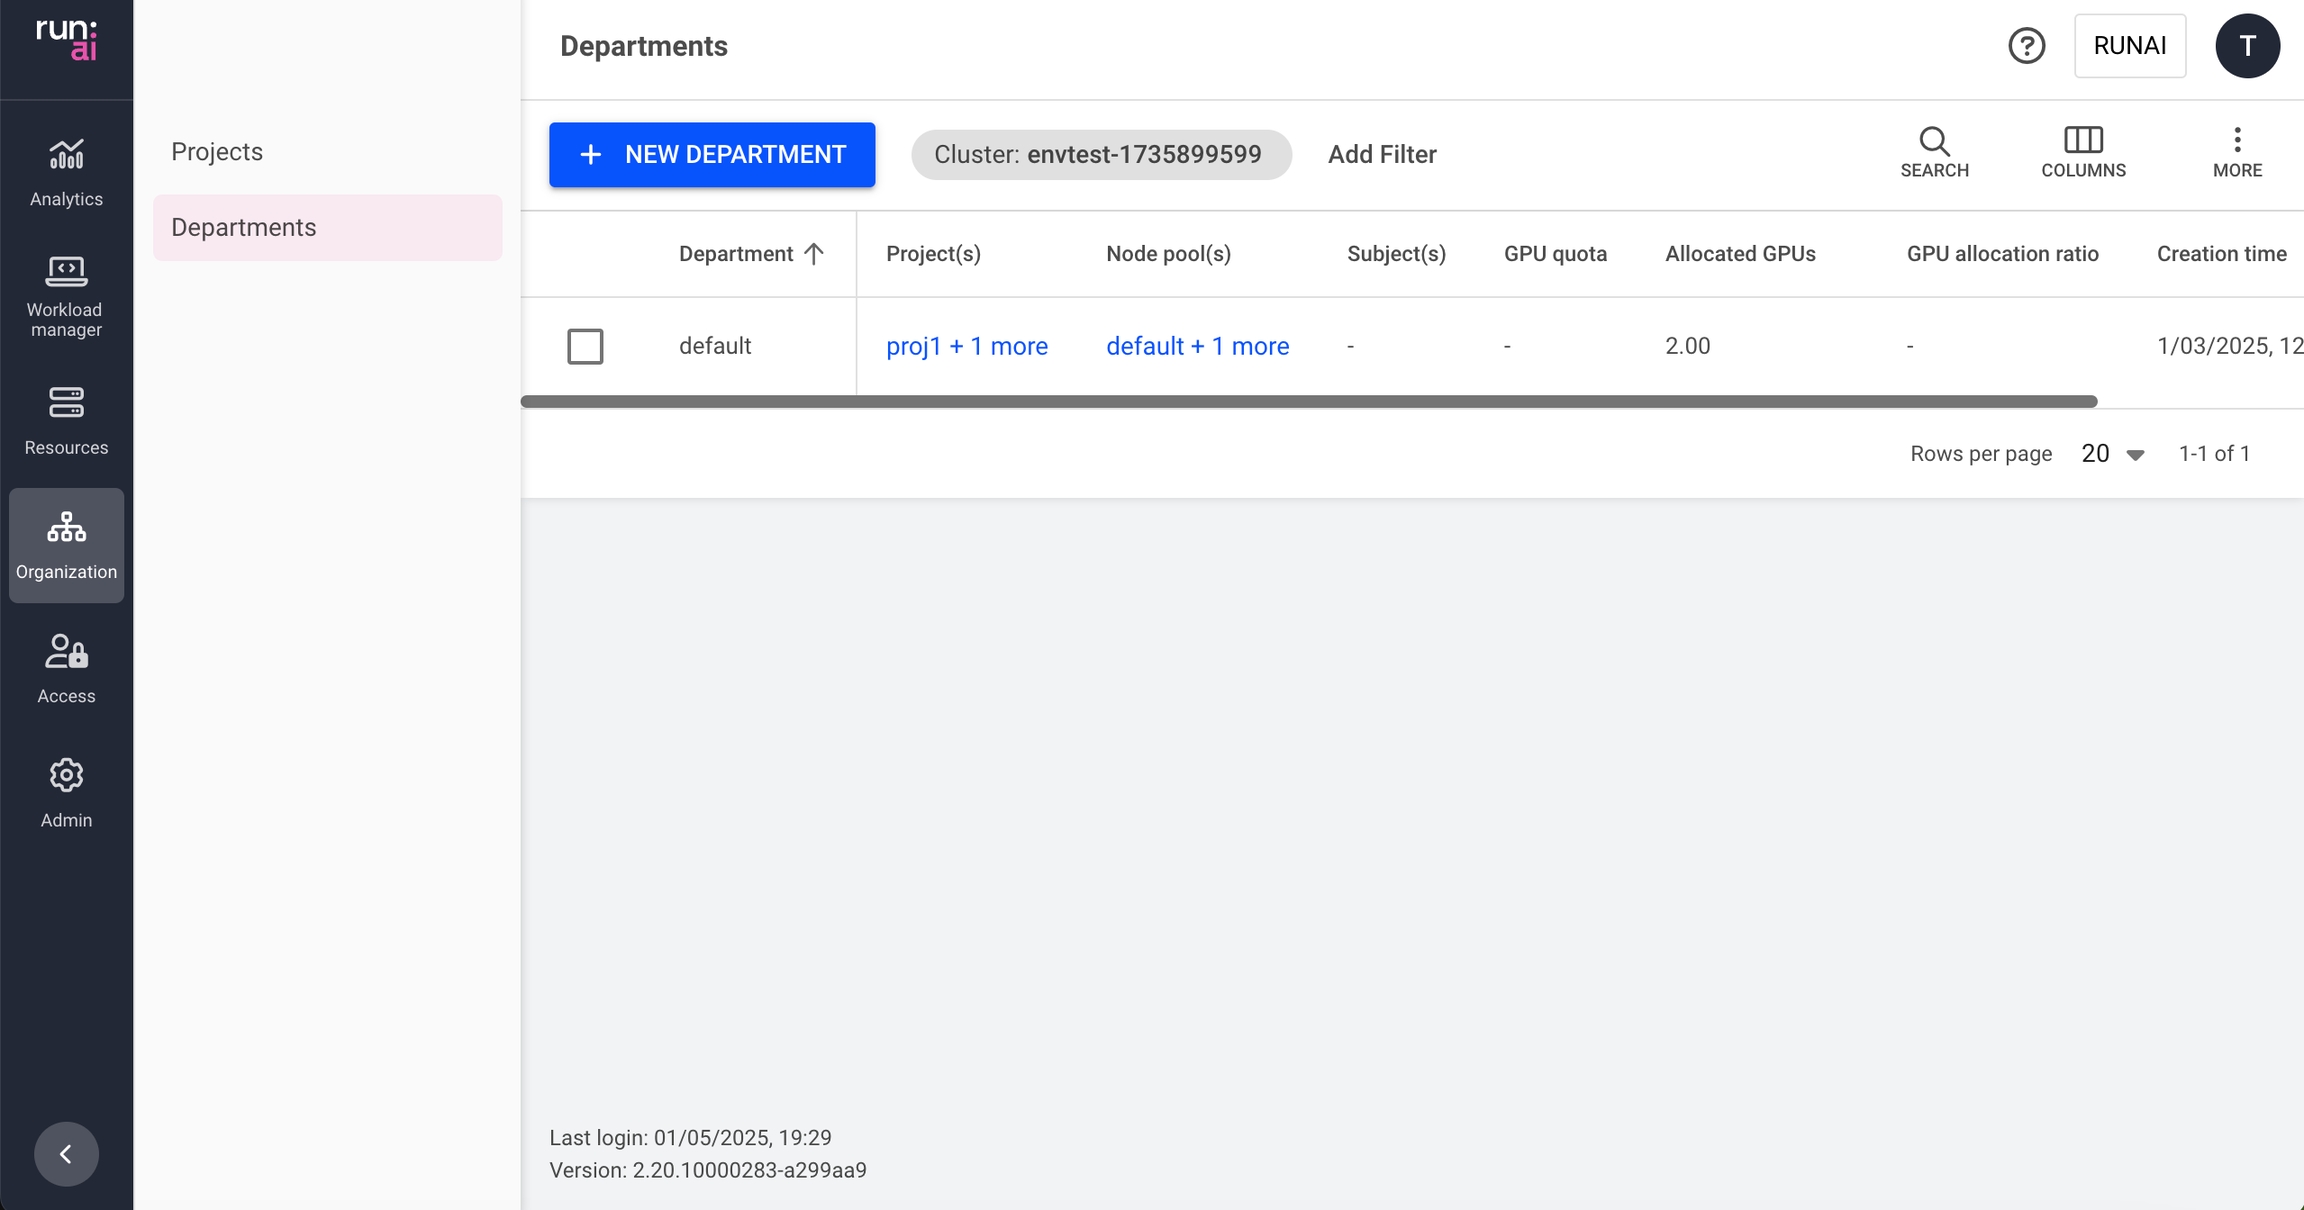
The Departments table consists of the following columns:
Department
The name of the department
Node pool(s) with quota
The node pools associated with this department. By default, all node pools within a cluster are associated with each department. Administrators can change the node pools’ quota parameters for a department. Click the values under this column to view the list of node pools with their parameters (as described below)
GPU quota
GPU quota associated with the department
Total GPUs for projects
The sum of all projects’ GPU quotas associated with this department
Project(s)
List of projects associated with this department
Subject(s)
The users, SSO groups, or applications with access to the project. Click the values under this column to view the list of subjects with their parameters (as described below). This column is only viewable if your role in NVIDIA Run:ai platform allows you those permissions.
Allocated GPUs
The total number of GPUs allocated by successfully scheduled workloads in projects associated with this department
GPU allocation ratio
The ratio of Allocated GPUs to GPU quota. This number reflects how well the department’s GPU quota is utilized by its descendant projects. A number higher than 100% means the department is using over quota GPUs. A number lower than 100% means not all projects are utilizing their quotas. A quota becomes allocated once a workload is successfully scheduled.
Creation time
The timestamp for when the department was created
Workload(s)
The list of workloads under projects associated with this department. Click the values under this column to view the list of workloads with their resource parameters (as described below)
Cluster
The cluster that the department is associated with
Customizing the table view
Filter - Click ADD FILTER, select the column to filter by, and enter the filter values
Search - Click SEARCH and type the value to search by
Sort - Click each column header to sort by
Column selection - Click COLUMNS and select the columns to display in the table
Download table - Click MORE and then Click Download as CSV. Export to CSV is limited to 20,000 rows.
Node pools with quota associated with the department
Click one of the values of Node pool(s) with quota column, to view the list of node pools and their parameters
Node pool
The name of the node pool is given by the administrator during node pool creation. All clusters have a default node pool created automatically by the system and named ‘default’.
GPU quota
The amount of GPU quota the administrator dedicated to the department for this node pool (floating number, e.g. 2.3 means 230% of a GPU capacity)
CPU (Cores)
The amount of CPU (cores) quota the administrator has dedicated to the department for this node pool (floating number, e.g. 1.3 Cores = 1300 mili-cores). The ‘unlimited’ value means the CPU (Cores) quota is not bound and workloads using this node pool can use as many CPU (Cores) resources as they need (if available)
CPU memory
The amount of CPU memory quota the administrator has dedicated to the department for this node pool (floating number, in MB or GB). The ‘unlimited’ value means the CPU memory quota is not bounded and workloads using this node pool can use as much CPU memory resource as they need (if available).
Allocated GPUs
The total amount of GPUs allocated by workloads using this node pool under projects associated with this department. The number of allocated GPUs may temporarily surpass the GPU quota of the department if over quota is used.
Allocated CPU (Cores)
The total amount of CPUs (cores) allocated by workloads using this node pool under all projects associated with this department. The number of allocated CPUs (cores) may temporarily surpass the CPUs (Cores) quota of the department if over quota is used.
Allocated CPU memory
The actual amount of CPU memory allocated by workloads using this node pool under all projects associated with this department. The number of Allocated CPU memory may temporarily surpass the CPU memory quota if over quota is used.
Subjects authorized for the project
Click one of the values of the Subject(s) column, to view the list of subjects and their parameters. This column is only viewable if your role in the NVIDIA Run:ai system affords you those permissions.
Subject
A user, SSO group, or application assigned with a role in the scope of this department
Type
The type of subject assigned to the access rule (user, SSO group, or application).
Scope
The scope of this department within the organizational tree. Click the name of the scope to view the organizational tree diagram, you can only view the parts of the organizational tree for which you have permission to view.
Role
The role assigned to the subject, in this department’s scope
Authorized by
The user who granted the access rule
Last updated
The last time the access rule was updated
Note
A role given in a certain scope, means the role applies to this scope and any descendant scopes in the organizational tree.
Adding a new department
To create a new Department:
Click +NEW DEPARTMENT
Select a scope. By default, the field contains the scope of the current UI context cluster, viewable at the top left side of your screen. You can change the current UI context cluster by clicking the ‘Cluster: cluster-name’ field and applying another cluster as the UI context. Alternatively, you can choose another cluster within the ‘+ New Department’ form by clicking the organizational tree icon on the right side of the scope field, opening the organizational tree and selecting one of the available clusters.
Enter a name for the department. Department names must start with a letter and can only contain lower case latin letters, numbers or a hyphen ('-’).
Under Quota Management, select a quota for the department. The Quota management section may contain different fields depending on pre-created system configuration. Possible system configurations are:
Existence of Node Pools
CPU Quota - Allow setting a quota for CPU resources.
When no node pools are configured, you can set the following quota parameters:
GPU Devices The number of GPUs you want to allocate for this department (decimal number). This quota is consumed by the department’s subordinated project.
CPUs (cores) (when CPU quota is set) The number of CPU cores you want to allocate for this department (decimal number). This quota is consumed by the department’s subordinated projects
CPUs memory (when CPU quota is set) The amount of CPU memory you want to allocate for this department (in Megabytes or Gigabytes). This quota is consumed by the department’s subordinated projects
When node pools are enabled, it is possible to set the above quota parameters for each node-pool separately.
In addition, you can decide whether to allow a department to go over quota. Allowing over quota at the department level means that one department can receive more resources than its quota when not required by other departments. If the over quota is disabled, workloads running under subordinated projects are not able to use more resources than the department’s quota, but each project can still go over quota (if enabled at the project level) up to the department’s quota.
Unlimited CPU(Cores) and CPU memory quotas are an exception - in this case, workloads of subordinated projects can consume available resources up to the physical limitation of the cluster or any of the node pools.
Example of Quota management:

Click CREATE DEPARTMENT
Adding an access rule to a department
To create a new access rule for a department:
Select the department you want to add an access rule for
Click ACCESS RULES
Click +ACCESS RULE
Select a subject
Select or enter the subject identifier:
User Email for a local user created in NVIDIA Run:ai or for SSO user as recognized by the IDP
Group name as recognized by the IDP
Application name as created in NVIDIA Run:ai
Select a role
Click SAVE RULE
Click CLOSE
Deleting an access rule from a department
To delete an access rule from a department:
Select the department you want to remove an access rule from
Click ACCESS RULES
Find the access rule you would like to delete
Click on the trash icon
Click CLOSE
Editing a department
Select the Department you want to edit
Click EDIT
Update the Department and click SAVE
Viewing a department’s policy
To view the policy of a department:
Select the department for which you want to view its policies. This option is only active if the department has defined policies in place.
Click VIEW POLICY and select the workload type for which you want to view the policies: a. Workspace workload type policy with its set of rules b. Training workload type policies with its set of rules
In the Policy form, view the workload rules that are enforcing your department for the selected workload type as well as the defaults:
Parameter - The workload submission parameter that Rule and Default is applied on
Type (applicable for data sources only) - The data source type (Git, S3, nfs, pvc etc.)
Default - The default value of the Parameter
Rule - Set up constraints on workload policy fields
Source - The origin of the applied policy (cluster, department or project)
Note
The policy affecting the department consists of rules and defaults. Some of these rules and defaults may be derived from the policies of a parent cluster (source). You can see the source of each rule in the policy form.
A policy set for a department affects all subordinated projects and their workloads, according to the policy workload type
Deleting a department
Select the department you want to delete
Click DELETE
On the dialog, click DELETE to confirm the deletion
Note
Deleting a department permanently deletes its subordinated projects, any assets created in the scope of this department, and any of its subordinated projects such as compute resources, environments, data sources, templates, and credentials. However, workloads running within the department’s subordinated projects, or the policies defined for this department or its subordinated projects - remain intact and running.
Reviewing a department
Select the department you want to review
Click REVIEW
Review and click CLOSE
Using API
To view the available actions, go to the Departments API reference.
Last updated