
Deploy Inference Workloads with NVIDIA NIM
This section explains how to deploy a GenAI model from Nvidia NIM as an inference workload via the NVIDIA Run:ai UI.
An inference workload provides the setup and configuration needed to deploy your trained model for real-time or batch predictions. It includes specifications for the container image, data sets, network settings, and resource requests required to serve your models.
The inference workload is assigned to a project and is affected by the project’s quota.
To learn more about the inference workload type in NVIDIA Run:ai and determine that it is the most suitable workload type for your goals, see Workload types.
Before You Start
Make sure you have created a project or have one created for you.
NVIDIA NIM requires an image that is pulled from the NGC catalog. Make sure a Docker registry credential is configured in your project (where the workload will run) with the following values:
Username:
$oauthtokenPassword:
<NGC API key>Docker registry URL:
nvcr.io
For a step-by-step guide on adding credentials to the gallery, see Credentials.
Note
Selecting the Inference type is disabled by default. If you cannot see it in the menu, then it must be enabled by your Administrator, under General settings → Workloads → Models.
Tolerations are disabled, by default. If you cannot see Tolerations in the menu, then it must be enabled by your Administrator, under General settings → Workloads → Tolerations
Creating a NIM Inference Workload
To add a new inference workload:
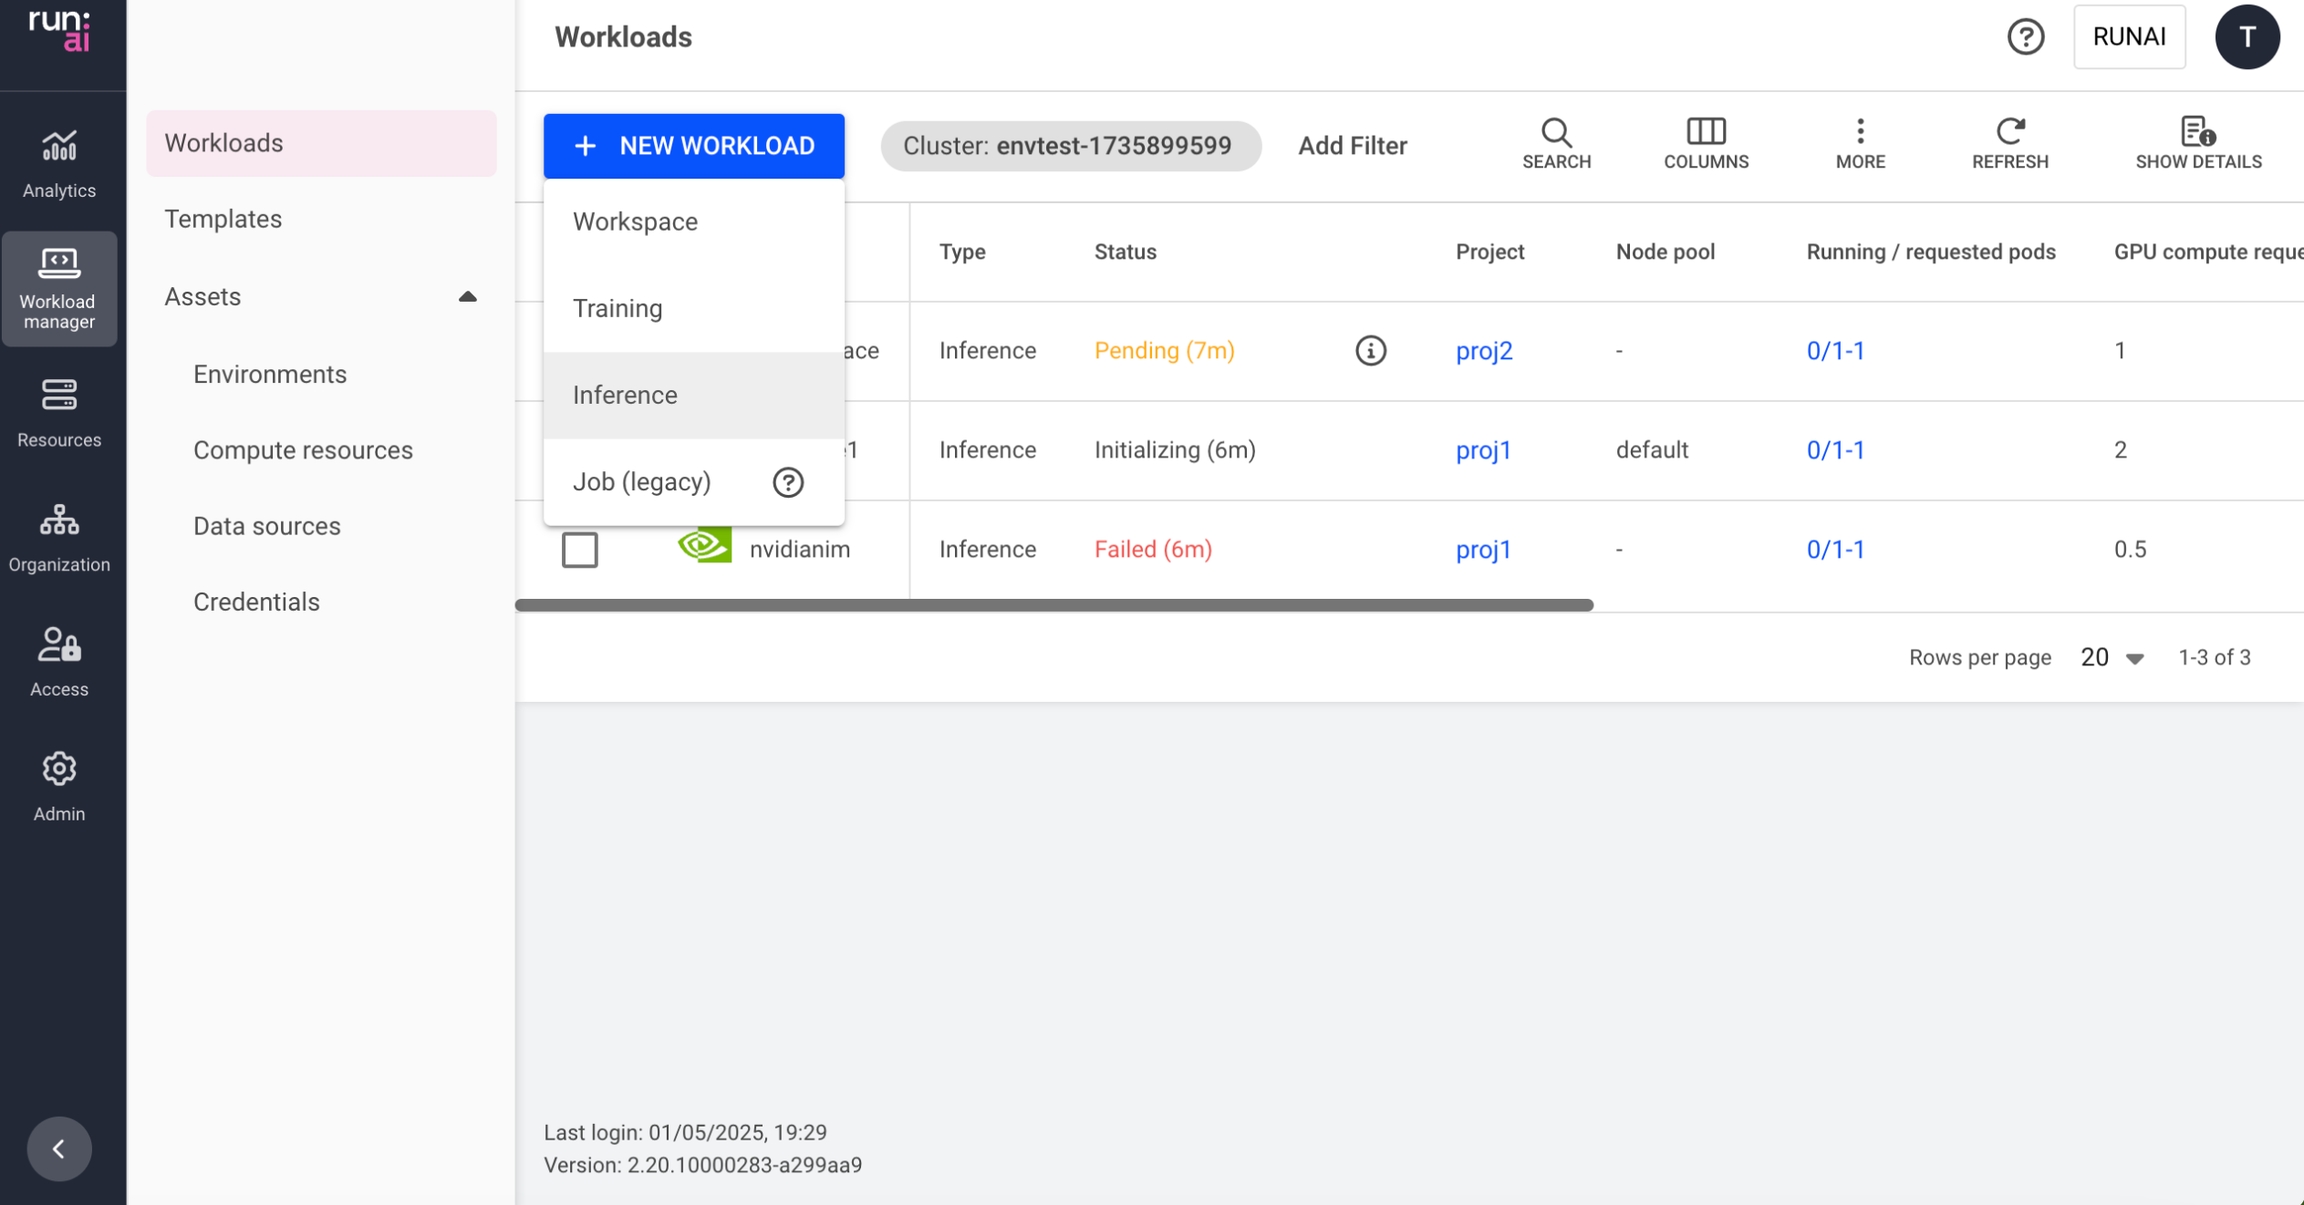
Go to the Workload manager → Workloads
Click +NEW WORKLOAD and select Inference Within the new inference form:
Select under which cluster to create the inference workload
Select the project in which your inference will run
Select NIM from Inference type
Enter a unique name for the inference workload (if the name already exists in the project, you will be requested to submit a different name)
Click CONTINUE In the next step:
Select the NIM model and set how to access
Set the model name by selecting a model or entering the model name as displayed in NIM
Set how the model profile should be selected
A NIM model profile sets compatible model engines and criteria for engine selection, such as precision, latency, throughput optimization, and GPU requirements. Profiles are optimized to balance either latency or throughput, with quantized profiles (e.g., fp8) preferred to reduce memory usage and enhance performance.
Automatically (recommended) NIM is designed to automatically select the most suitable profile from the list of compatible profiles based on the detected hardware. Each profile consists of different parameters that influence the selection process.
Manually
Enter profile name or hash
Optional: Modify who can access the inference serving endpoint
Public (default)
Everyone within the network can access the endpoint with no authentication
All authenticated users
Everyone within the organization’s account that can log in (to NVIDIA Run:ai or SSO)
Specific group(s)
Click +GROUP
Enter group names as they appear in your identity provider. You must be a member of one of the groups listed to have access to the endpoint.
Specific user(s)
Click +USER
Enter a valid email address or username. If you remove yourself, you will lose access to the endpoint.
Select how to access the model store
From NVIDIA NGC - The model is downloaded when the workload starts running
Set the NVIDIA NGC API key
Enter a key
(Optional) Click Storage - When downloading a model from NVIDIA NGC, selecting storage is recommended. Select a data source where the model is already cached to reduce loading time or click +NEW DATA SOURCE to add a new data source to the gallery. This will cache the model and reduce loading time for future use. If there are issues with the connectivity to the cluster, or issues while creating the data source, the data source won't be available for selection. For a step-by-step guide on adding data sources to the gallery, see data sources. Once created, the new data source will be automatically selected.
From storage - The model is accessed directly and without being downloaded
Storage - Set where to load the model Select a data source or click +NEW DATA SOURCE to add a new data source to the gallery. If there are issues with the connectivity to the cluster, or issues while creating the data source, the data source won't be available for selection. For a step-by-step guide on adding data sources to the gallery, see data sources. Once created, the new data source will be automatically selected.
Select the compute resource for your inference workload
Select a compute resource or click +NEW COMPUTE RESOURCE to add a new compute resource to the gallery. For a step-by-step guide on adding compute resources to the gallery, see compute resources. Once created, the new compute resource will be automatically selected.
Optional: Set the minimum and maximum number of replicas to be scaled up and down to meet the changing demands of inference services.
If the number of minimum and maximum replicas are different, autoscaling will be triggered and you'll need to set conditions for creating a new replica. A replica will be created every time a condition is met. When a condition is no longer met after a replica was created, the replica will be automatically deleted to save resources.
Select a variable - The variable's values will be monitored via the container's port.
Latency (milliseconds)
Throughput (Requests/sec)
Concurrency (Requests)
Set a value - This value is the threshold at which autoscaling is triggered
Optional: Set when the replicas should be automatically scaled down to zero. This allows the compute resources to be freed up when the model is inactive (i.e., there are no requests being sent). When automatic scaling to zero is enabled, the minimum number of replicas set in the previous step, automatically changes to 0
Optional: Set the order of priority for the node pools on which the scheduler tries to run the workload. When a workload is created, the scheduler will try to run it on the first node pool on the list. If the node pool doesn't have free resources, the scheduler will move on to the next one until it finds one that is available.
Drag and drop them to change the order, remove unwanted ones, or reset to the default order defined in the project.
Click +NODE POOL to add a new node pool from the list of node pools that were defined on the cluster. To configure a new node pool and for additional information, see node pools.
Select a node affinity to schedule the workload on a specific node type. If the administrator added a ‘node type (affinity)’ scheduling rule to the project/department, then this field is mandatory. Otherwise, entering a node type (affinity) is optional. Nodes must be tagged with a label that matches the node type key and value.
Optional: Set toleration(s) to allow the workload to be scheduled on a node with a matching taint.
Click +TOLERATION
Enter a key
Select the operator
Exists - If the key exists on the node, the effect will be applied
Equals - If the key and the value set below matches to the value on the node, the effect will be applied
Enter a value matching the value on the node
Select the effect for the toleration
NoExecute - Pods that do not tolerate this taint are evicted immediately.
NoSchedule - No new pods will be scheduled on the tainted node unless they have a matching toleration. Pods currently running on the node will not be evicted.
PreferNoSchedule - The control plane will try to avoid placing a pod that does not tolerate the taint on the node, but it is not guaranteed.
Any - All effects above match.
Optional - General settings:
Set the timeframe for auto-deletion after workload completion or failure. The time after which a completed or failed workload is deleted; if this field is set to 0 seconds, the workload will be deleted automatically.
Set annotations(s) Kubernetes annotations are key-value pairs attached to the workload. They are used for storing additional descriptive metadata to enable documentation, monitoring and automation.
Click +ANNOTATION
Enter a name
Enter a value
Set labels(s) Kubernetes labels are key-value pairs attached to the workload. They are used for categorizing to enable querying. To add labels:
Click +LABEL
Enter a name
Enter a value
Click CREATE INFERENCE
Managing and Monitoring
After the inference workload is created, it is added to the Workloads table, where it can be managed and monitored.
Last updated